Endorfy Celeris 1800: A Comprehensive Guide to the Software
Introduction
The Endorfy Celeris 1800 is more than just a mechanical keyboard. It’s built for users who want performance, customization, and a modern user experience — all in a compact layout. This guide walks you through setup, software features, and how to get the most out of your keyboard.
1. Installing the Software
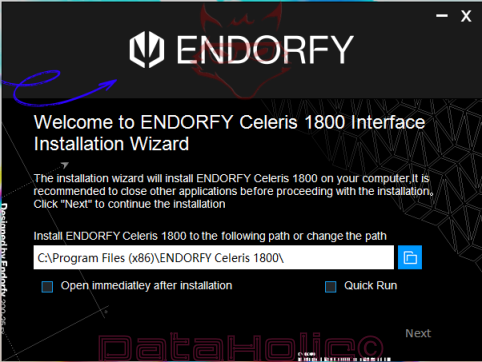
1.1 Start the Setup
After downloading the installer, the setup wizard will open. Here you can choose whether the software should launch right after installation and whether to enable Quick Run. The default installation path is:
C:\Program Files (x86)\ENDORFY Celeris 1800\
Just click „Next“ to continue.
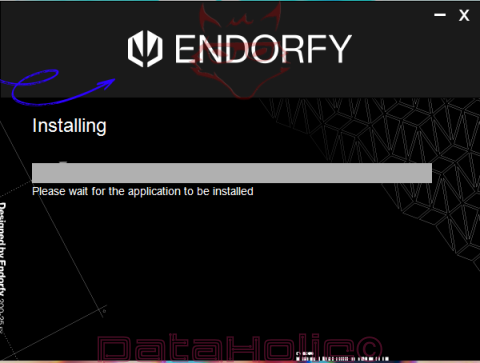
1.2 Let the Installation Run
The next step runs automatically. No input needed — just wait until the progress bar completes.
1.3 After Installation
If you selected „Open immediately after installation,“ the software will launch right away. Otherwise, you’ll find it in the Start Menu or on your desktop. Updates are usually detected automatically, but you can also check manually via the „Other“ tab.
2. Overview of the User Interface
Once installed, you can open the software from the Start Menu or by clicking the icon. The interface is divided into four main sections:
- Illumination
- Buttons
- Macros
- Other
On the left, you’ll find profile management; on the right, a visual layout of the keyboard with matching options. The software automatically detects the Celeris 1800 model and displays the appropriate key layout.
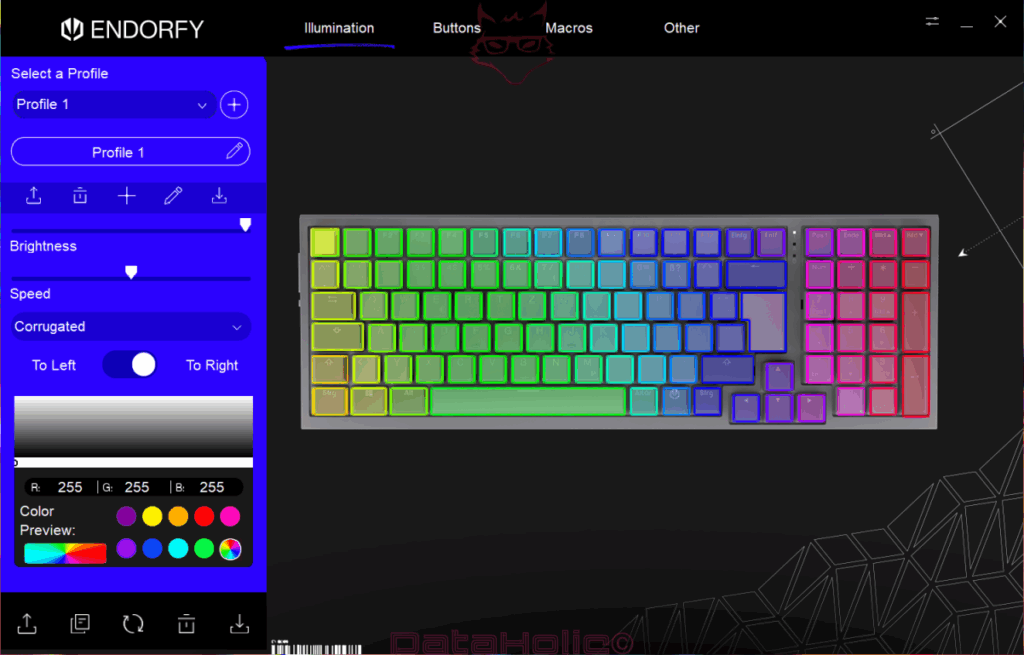
3. Illumination: RGB Your Way
3.1 Color Modes and Effects
In the “Illumination” section, you can choose from various lighting modes — from static colors to animated effects like Corrugated, Wave, or Ripple.
You can also:
- Set animation direction („To Left“ or „To Right“)
- Adjust brightness and speed
- Choose colors via spectrum or RGB values
3.2 Color Management
A preview palette gives you eight quick colors, plus full RGB sliders for custom color selection. You can create your own gradients or color combinations — useful for specific games or moods.
3.3 Save Profiles
You can save settings in multiple profiles — for example, one for gaming, one for work, and one for night mode. Each profile can include its own lighting, key assignments, and macros.
3.4 Export/Import Profiles
Use the buttons at the bottom left to export or import profiles. Handy if you switch between computers or want to share setups with friends.
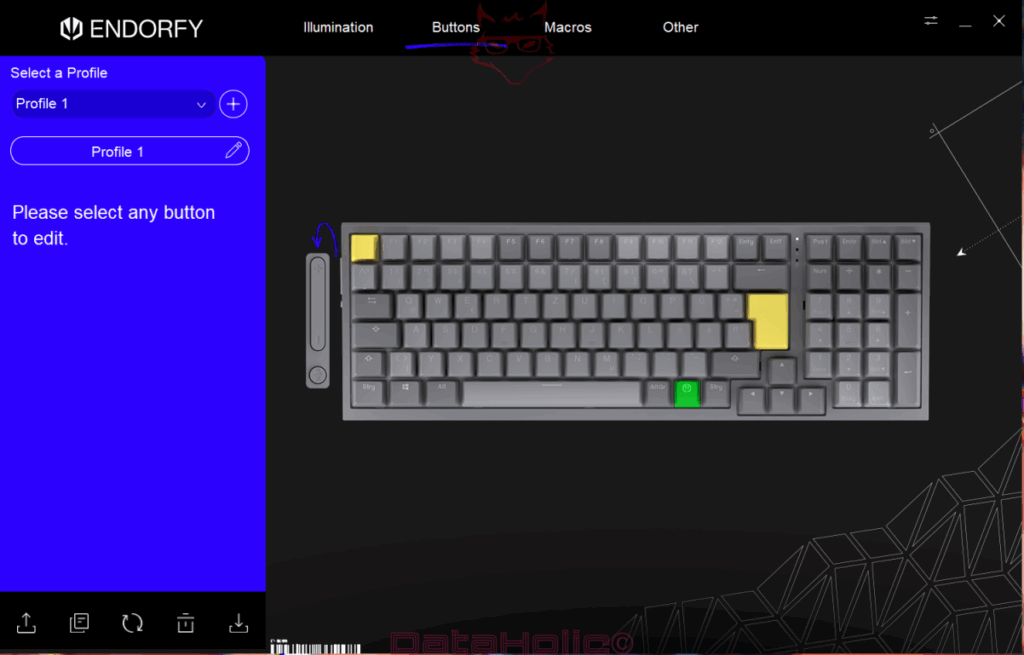
4. Buttons: Customize Every Key
The “Buttons” tab lets you assign new functions to any key. Just click a key in the visual layout to open the edit menu.
4.1 Available Actions
- Reassign standard functions (e.g. ESC to Caps Lock)
- Set multimedia controls (Play, Pause, Volume Up/Down)
- Assign macros (from Tab 3)
- Launch programs or files
- Use system functions like „Screenshot“ or „Open Task Manager“
4.2 Special Function Keys
You can also configure special controls like the volume knob or power button. The left-side dial and button can be assigned custom actions or macros.
4.3 Reset and Undo
At the bottom of the tab, you’ll find icons to reset individual keys or the entire layout. There’s also an undo button in case you misclick.
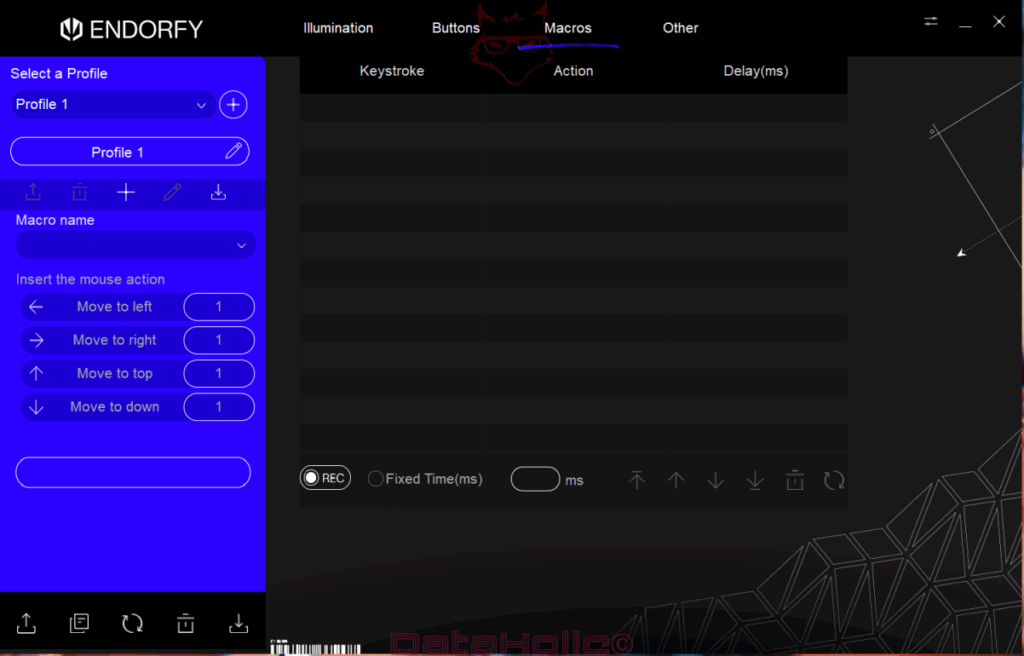
5. Macros: Automate Your Workflow
5.1 Creating Macros
In the „Macros“ tab, you can record complex sequences of keystrokes or mouse movements:
- Name your macro
- Click “REC”
- Perform the key/mouse sequence
- Optionally add delays (in milliseconds)
- Save the macro
5.2 Add Mouse Actions
You can also include mouse movements, like “Move to left” or “Move to top.” Direction and repeat rate can be set individually — useful for creative apps or AutoHotkey workflows.
5.3 Manage and Edit
Created macros are listed with columns for Keystroke, Action, and Delay (ms). You can rearrange, delete, or edit individual steps.
5.4 Link Macros to Profiles
Each macro can be linked to a specific profile. When you switch profiles, the corresponding macro set loads automatically.
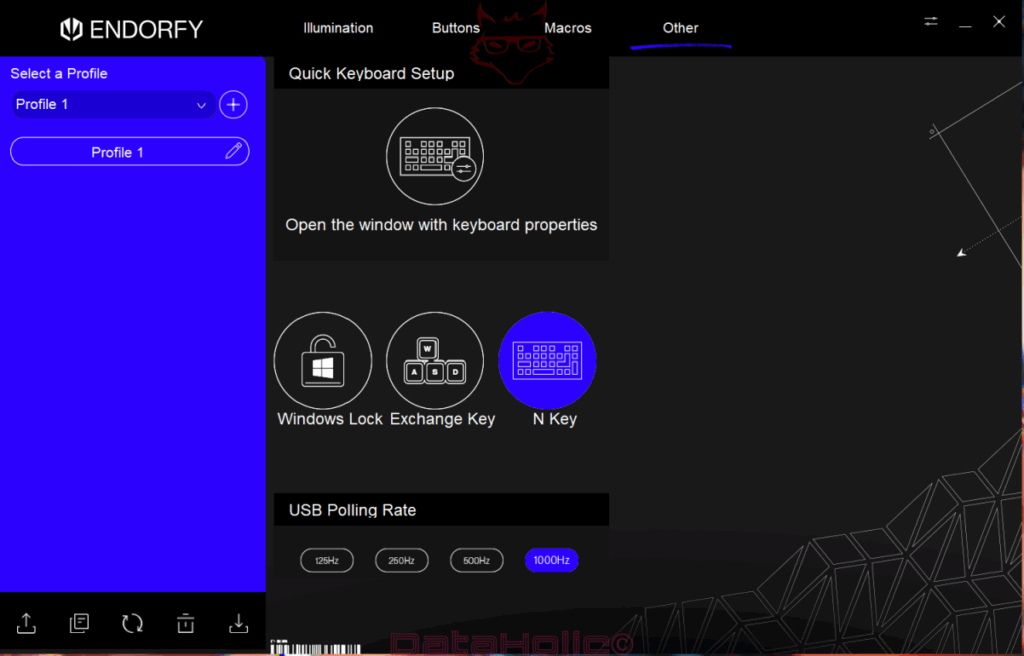
6. Other: General Settings
The “Other” tab contains system-level settings:
- Windows Lock: Disables the Windows key, useful for gaming
- Exchange Key: Swaps two keys (e.g. Y and Z)
- N-Key Rollover: Enables multiple simultaneous key presses without conflict
- USB Polling Rate: Switch between 125Hz, 250Hz, 500Hz, and 1000Hz — higher means faster response
7. Design and Layout of the Celeris 1800
The Celeris 1800 is a so-called “1800-Compact” keyboard, meaning:
- Full layout with number pad
- More compact than standard full-size keyboards
- Dedicated media and control keys
- Additional rotary dial and multifunction button on the left
Features include:
- Solid build with aluminum top plate (depending on model)
- High-quality mechanical switches
- Doubleshot keycaps for long-lasting legends
- Detachable USB-C cable
8. Everyday Performance
Hardware and software really come together in real-world use:
8.1 Typing and Coding
Comfortable typing feel — great for heavy typists. Macros can store code snippets or hotkey combos.
8.2 Gaming
- Anti-Ghosting and N-Key Rollover ensure accurate input
- Game-specific key mappings via profiles
- Quick-access macros for looting, reloading, or skills
8.3 Office & Media
- Media controls via dedicated keys
- Launch apps with shortcuts
- Macros for email templates, Excel formulas, or copy-paste routines
9. Compatibility and System Requirements
The software runs on all current Windows versions:
- Windows 10 (32/64-bit)
- Windows 11
Requirements:
- 1 free USB port
- At least 100 MB of free disk space
- Internet connection recommended for updates
10. Tips for Advanced Users
10.1 Combine Macros
You can chain macros — for example, one to open Photoshop and another to create a new document right after.
10.2 Game-Specific Profiles
Create separate profiles for each game with:
- Genre-specific color schemes
- Skill or menu hotkey mapping
- Remapped keys for better ergonomics
10.3 Backup & Sync
Export your profiles regularly, store them in the cloud (e.g. OneDrive), and import them on other machines — for maximum flexibility.