Unboxing & Installation of the MSI MAG X870E Gaming Plus Max WiFi – A Technical Deep Dive
- 1. Context: A Motherboard That’s More Than a Placeholder
- 2. Packaging: Clear, Technical, Purpose-Driven
- 3. First Look Inside
- 4. Accessories: Practical and Complete
- 5. The Motherboard: Layout, Design, Engineering
- 6. Preparing for Installation
- 7. Installing the CPU
- 8. Installing the M.2 SSDs
- 9. Installing the Board Inside the Case
- 10. First Boot: The System Comes to Life
1. Context: A Motherboard That’s More Than a Placeholder
When a new motherboard arrives, you usually expect a practical piece of hardware—something that quietly gets the job done, looks decent, and forms the backbone for the „real“ components. With the MSI MAG X870E Gaming Plus Max WiFi, that impression shifts instantly. Even the box feels more like a hybrid between a toolkit and a technical ID card, solid enough to feel serious without turning into an overproduced showpiece.
The X870E chipset belongs to AMD’s newest Ryzen 9000 generation and introduces native support for PCIe 5.0, DDR5, high-speed USB standards, and modern networking features. MSI’s MAG series traditionally targets users who operate within enthusiast territory but don’t feel the need to pay premium prices for prestige-only features. This board fits right into that philosophy: ambitious, structured, and focused on meaningful performance rather than marketing fireworks.
At the same time, the first impression doesn’t resemble a compromise at all. It feels like a tool deliberately chosen because it solves real problems. To borrow Isaac Asimov’s line: “Science gathers knowledge faster than society gathers wisdom.” This board seems built for users who know exactly why they want three M.2 slots, 40 Gbps USB, or a 14-phase VRM design.

2. Packaging: Clear, Technical, Purpose-Driven
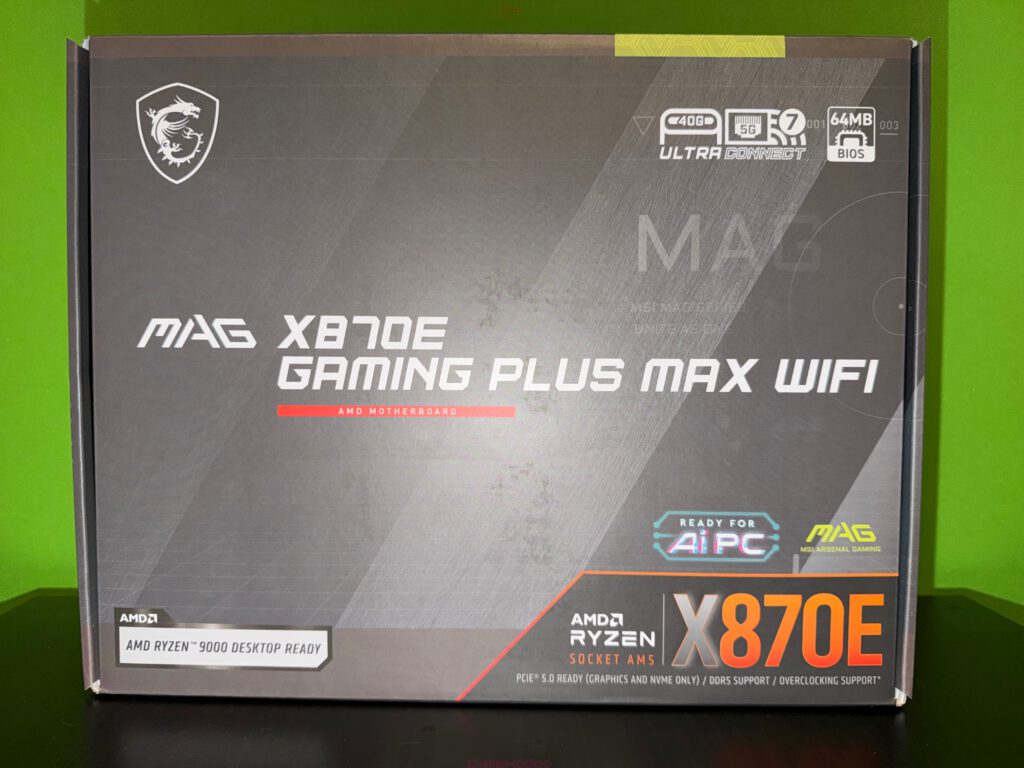
The box follows MSI’s characteristic black-and-grey design language, with sharp typography and technical highlights. The front prominently lists the model name and a series of feature badges: USB 40 Gbps, WiFi 7, 64 MB BIOS Flash, PCIe Gen5, and the “Ultra-Connect” architecture.
The back of the box is where things get genuinely interesting: a detailed technical breakdown, a labeled board layout, and a clear list of core design choices—14 Duet Rail Power System, Lightning Gen5, Triple M.2, EZ PCIe Release, EZ M.2 Shield Frozr II, 5G LAN, and so on. It’s the type of rear panel that hardware enthusiasts actually read instead of skipping.
You instantly get the sense that this motherboard isn’t trying to impress through theatrics, but through engineering.
3. First Look Inside
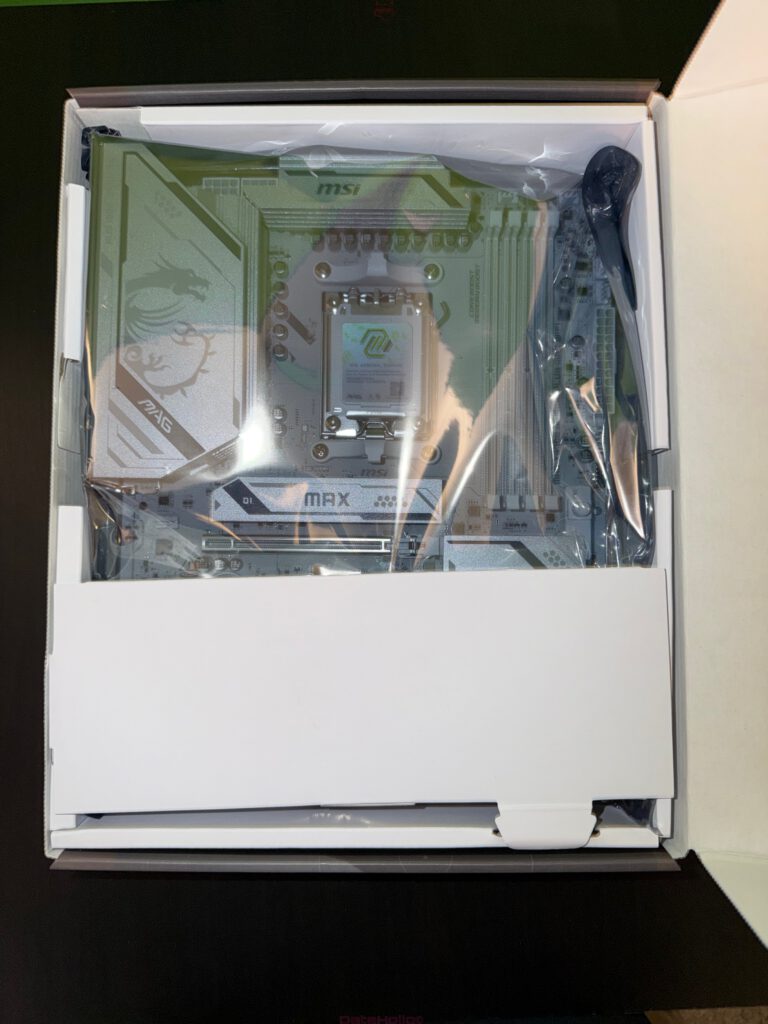
Opening the box reveals the motherboard in its anti-static bag, protected by a fitted cardboard insert that holds everything firmly in place. The board’s appearance is striking: a bright, white-silver aesthetic, clean angles, and MSI’s dragon emblem subtly etched into the VRM heatsink. The overall structure looks deliberate—no chaotic traces, no gimmicky shapes, just crisp organization.
Underneath the board lies the accessory compartment. MSI hasn’t downsized the bundle the way many manufacturers have begun doing, which already sets a positive tone. Everything inside serves a clear practical purpose.
4. Accessories: Practical and Complete
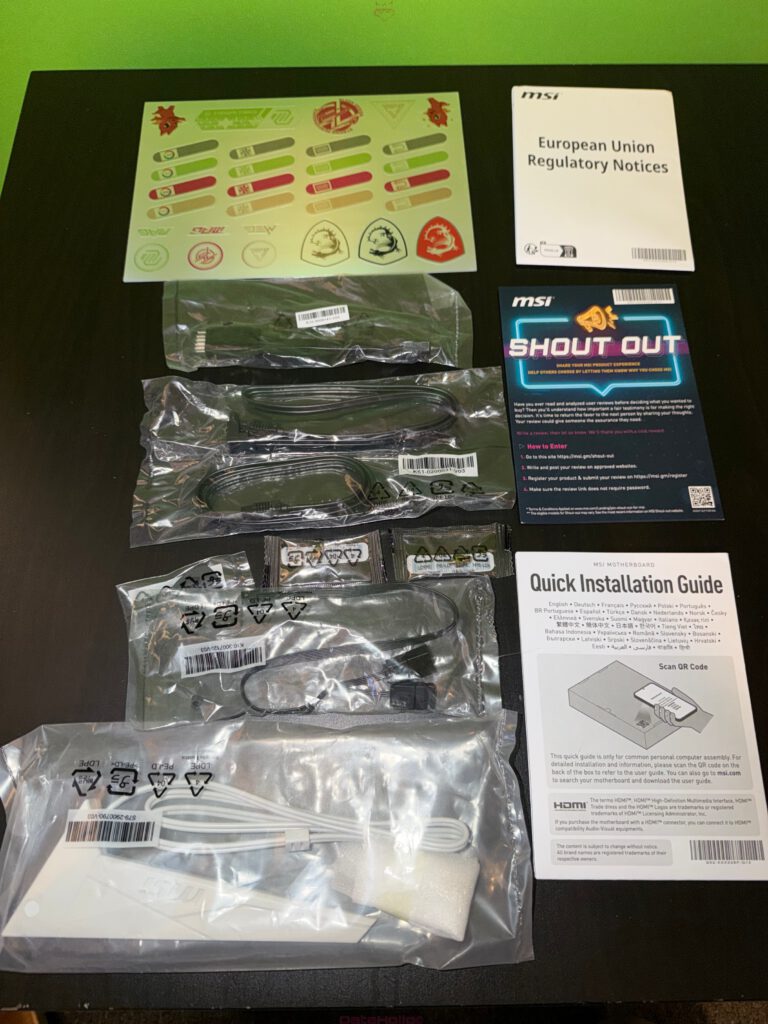
The included accessories focus entirely on functionality:
- SATA cables
- WiFi antenna set
- Front-panel adapter
- M.2 screws and standoffs
- ARGB and PWM cables
- A quick installation guide
- EU regulatory documentation
- A sticker sheet
The sticker sheet strikes a nice balance between decorative and functional labels—helpful for cable organization or marking storage devices.
The WiFi antennas feel sturdy, not like the flimsy plastic pieces that often ship with cheaper boards. Their foldable design is intended to maximize WiFi 7 throughput in real-world conditions.
Everything in the box matches the board’s target audience: builders who value practicality and clean execution.
5. The Motherboard: Layout, Design, Engineering
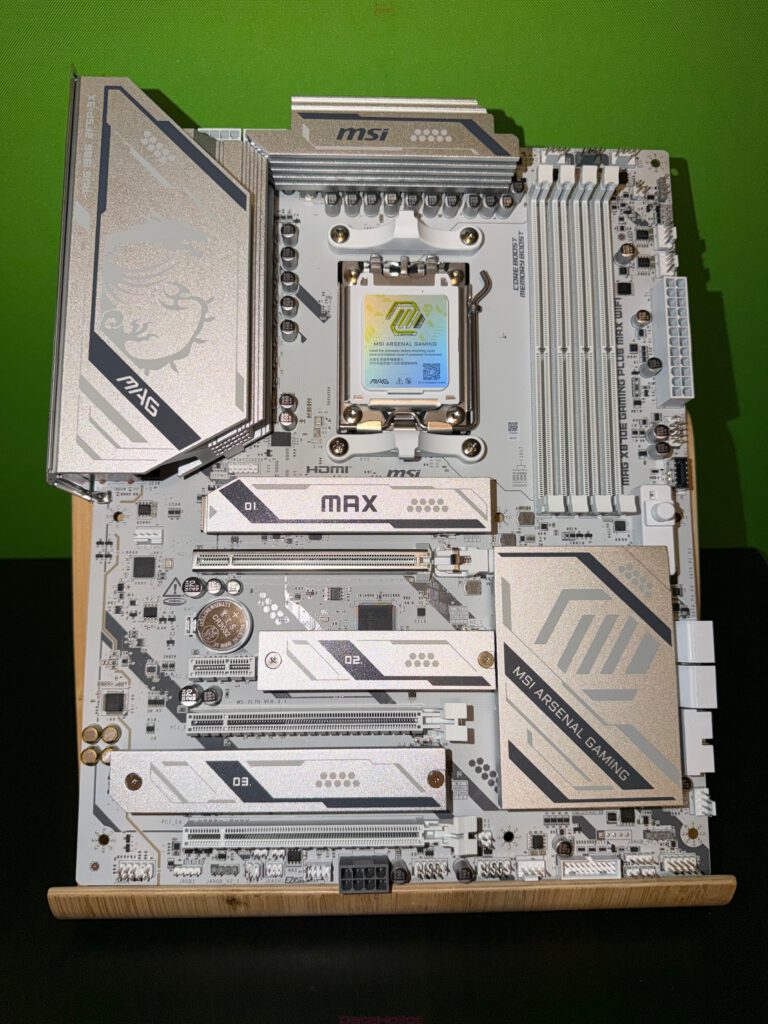
Once freed from its anti-static cocoon, the board shows its full identity. Standard ATX layout, reinforced slots, wide heatsinks, and a very clean, almost architectural component distribution. The bright color scheme blends seamlessly into white builds, as the later installation photos demonstrate.
5.1 VRM Design and Power Delivery
The 14-phase Duet Rail power system indicates that the board is built for high-end CPUs, including the Ryzen 9000 lineup. MOSFETs sit beneath a wide heatsink array connected by a heatpipe, designed to distribute thermal load evenly.
AMD’s modern CPUs adjust boost frequencies dynamically based on thermal and electrical headroom. Stable VRM behavior is therefore essential. MSI’s approach here is clear: fewer theatrics, more engineering. The VRM layout looks understated, but it’s solid and built for sustained load.
5.2 Memory Slots
Four DDR5 DIMM slots support up to 256 GB. The latching mechanisms feel firm, the socket reinforcement is good, and next to the 24-pin power header you’ll find diagnostic LEDs—absolute lifesavers during new system builds.
Clear feedback is what separates a smooth setup from hours of frustration when the system doesn’t boot on the first try.
5.3 PCIe Layout and EZ-Release
The top x16 slot is steel-reinforced and runs at PCIe 5.0. Below it, additional PCIe 4.0 slots are available.
The EZ-PCIe-Release is a particularly smart addition. Anyone who has tried removing a high-end GPU like the XFX Radeon RX 6800 XT from a tight case knows the struggle of reaching the tiny latch beneath the card. This mechanism raises that latch to an accessible position—simple, clever, effective.
5.4 M.2 Slots
With three M.2 slots, each covered by MSI’s Shield Frozr heatsinks, the board is well-equipped for multi-NVMe setups. The top slot supports PCIe 5.0, ideal for next-gen SSDs. The heatsinks feel substantial without being oversized, and the screws are easy to reach—no awkward angles, no tiny parts that vanish under the table.
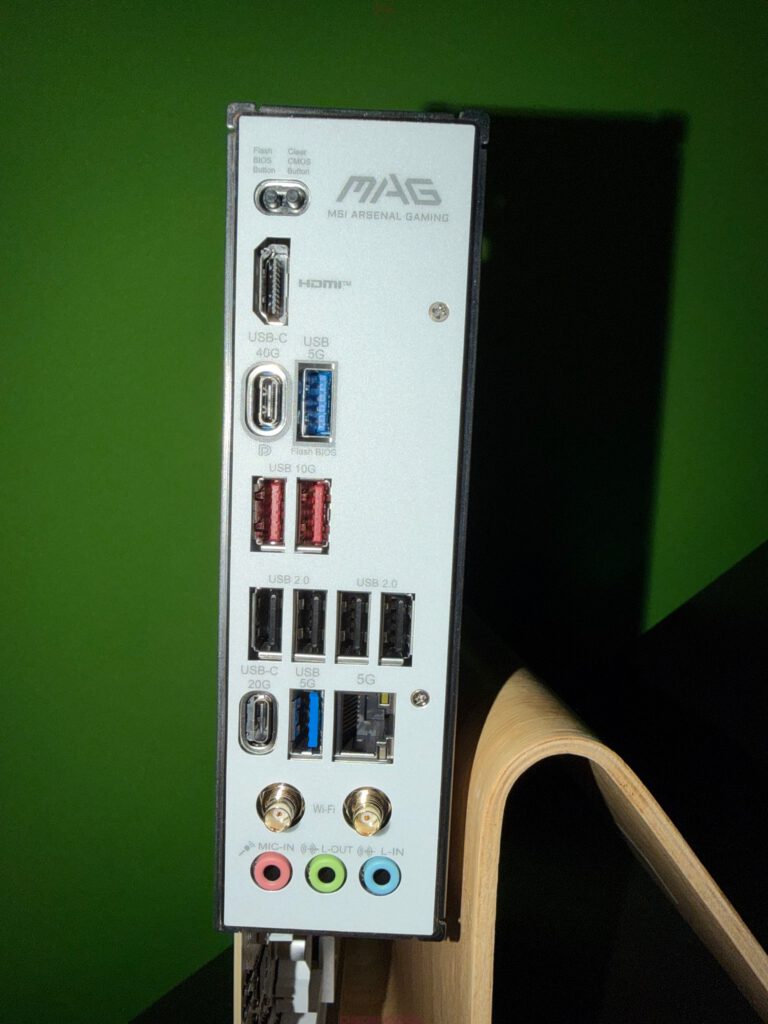
5.5 Rear I/O
The I/O panel presents a well-balanced selection:
- USB-C 40 Gbps
- USB-C 20 Gbps
- 10 Gbps USB ports
- 5 Gbps USB ports
- HDMI for troubleshooting
- 5G LAN
- WiFi 7 antenna ports
- A BIOS Flash button
The Flash BIOS button is perhaps the most underrated feature. A board that can update its firmware without a CPU or RAM provides enormous peace of mind in case you’re pairing new processors with early BIOS versions.
6. Preparing for Installation
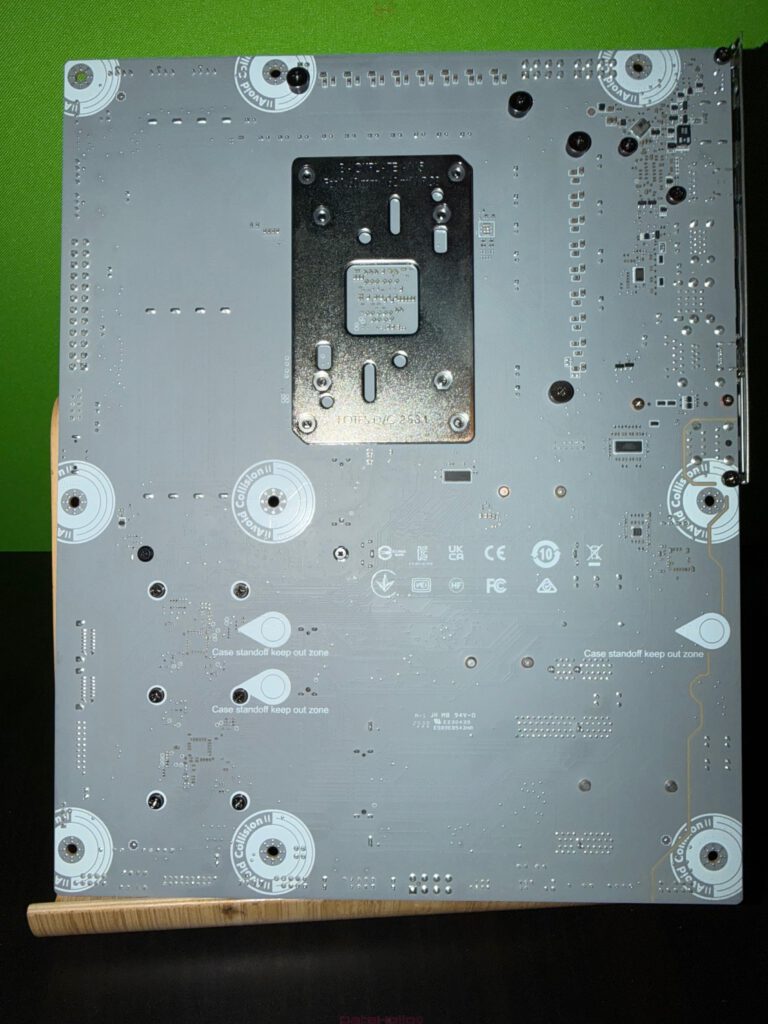
The motherboard is placed on a grounded surface. The AM5 socket cover remains in place until the CPU is ready to be installed. AM5 uses a robust retention mechanism that distributes pressure evenly—an improvement over earlier socket generations.
The rear mounting plate is already attached, ensuring compatibility with AM5-ready coolers and preventing misalignment.
If SSDs are part of the build, now is the right time to open the M.2 slots and prepare the pads before the board enters the cramped environment of the case.

7. Installing the CPU
Although the photographed board already has the CPU installed, the process is straightforward: lift the retention arm, open the cover, align the processor with the triangle marker, gently seat it, then lower and secure the arm. The CPU fits snugly—no wobble, no resistance, exactly as it should.
Ryzen 9000 processors have a precise heat spreader geometry that makes alignment intuitive.
8. Installing the M.2 SSDs
Each M.2 heatsink is removed, thermal pads are checked, and the SSD is placed into the chosen slot. Using the Gen5 slot for the primary OS drive—whether or not it’s a Gen5 SSD—benefits from the best cooling.
The screws behave nicely here: they’re accessible, not overly tiny, and easy to handle with a standard screwdriver. The heatsinks go back on smoothly, thermal pads settle correctly, and no corners lift.
9. Installing the Board Inside the Case
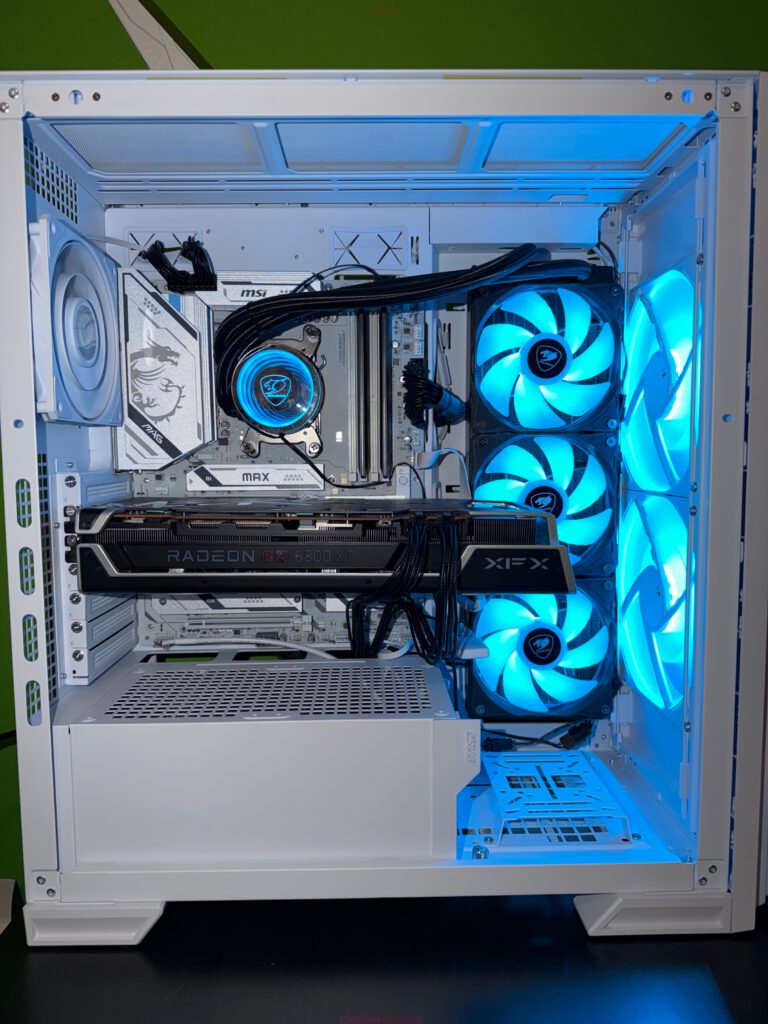
The system shown uses a white PC case, which visually emphasizes the board’s bright design. The clean aesthetic becomes a functional advantage—disorderly cable routing would stand out immediately, encouraging a tidy build.
9.1 Case Preparation
The fans are already mounted, the radiator is installed, and cable pathways are opened. The PSU shroud leaves enough space for GPU cables and airflow.
9.2 Placing the Motherboard
The board aligns cleanly with the standoffs. Once the first screws go in, the structure locks into place without tension. ATX should feel like this—predictable and stress-free.
9.3 Connecting Cables
The 24-pin connector on the right side is easily accessible. The EPS 8-pin connection near the top left can be tricky in many cases, but the shown system handles it gracefully.
Front-panel connectors are clearly labeled. The included adapter is a small but highly effective quality-of-life feature, reducing the chance of reversing polarity or scrambling the pin order.
9.4 Mounting the AIO
The AIO cooler sits firmly on the preinstalled AM5 backplate. Modern coolers usually include AM5 brackets out of the box, so there’s no improvised alignment required.
Pump and fan cables route to the motherboard’s fan headers, which MSI labels clearly. Future tuning of fan curves becomes much more intuitive this way.
9.5 Installing the GPU
The XFX Radeon RX 6800 XT is a heavy card. The reinforced slot holds it securely, while the EZ-PCIe-Release ensures future removal won’t turn into a battle of patience.
9.6 Cable Management
Black cables against the bright board create a clean contrast. Organized cable routing not only improves airflow but also complements the technical aesthetic. The overall build becomes a structured environment that’s easy to maintain and pleasant to work with.
10. First Boot: The System Comes to Life
On the first startup, the debug LEDs illuminate briefly—a clear sign of proper initialization. The fans spin up, the AIO lighting activates, and within seconds the BIOS screen appears.
The later images show the system fully running, illuminated in cool blue tones that fit the white hardware perfectly. The board remains quiet, temperatures are stable, and there are no unexpected behaviors.
Everything behaves exactly as a modern AM5 system should.
Transparency Notice (as requested, included as a quote):
“The MSI MAG X870E Gaming Plus Max WiFi featured in this review was provided to us by MSI as a non-binding test loan. This is not paid advertising.
MSI had no influence on the content, assessment, or editorial independence of this article. All opinions expressed are based solely on our own hands-on experience.
We sincerely thank MSI for supplying the motherboard and for their trust in dataholic.de.”