Razer Synapse and the Viper V3 Pro – The Nerve Center Behind a Pro-Grade Mouse
- Installation and First Steps: Turning a Lightweight into a High-End Weapon
- The Synapse Interface: Dashboard, Mouse Tab, and Gamer Room
- Customize: Button Mapping, Hypershift, and Profile Logic
- Performance: DPI, Sensitivity Stages, and Polling Rate up to 8000 Hz
- Calibration, Lift-Off Distance, and Surface Adjustment
- Power Tab: Battery Life vs. Responsiveness
- Profiles, Cloud, and Onboard Memory: One Profile, Many Personalities
- Macros and Automation: A Tool, Not a Crutch
- HyperPolling Wireless Software: Fine Tuning for 8000 Hz
- Optical vs. Mechanical Switches – Why the Viper V3 Pro Clicks the Way It Does
- Practical Use Cases: Fine-Tuning for Esports, Work, and Creativity
- (Not a Final Verdict—Just the Software Perspective)
When you take the Razer Viper V3 Pro out of the box for the first time, its weight makes you question whether you’re holding a fully developed product or a prototype shell fresh out of a 3D printer. At just 54 grams, with no RGB, no decorative detours, and no visual fluff, the mouse radiates pure esports minimalism. But the real magic isn’t in the shell—it lives in the interplay between Razer Synapse, the HyperPolling Wireless Dongle, the firmware, and the software layer that turns this lightweight piece of plastic into a precision instrument.
That’s what this section is about. No unboxing talk, no hand-feel impressions—only the software ecosystem that elevates the Viper V3 Pro into a tool for players who want absolute control over every parameter: DPI tuning, 8000 Hz polling, power management, profiles, calibration, and the logic behind optical switches.
Installation and First Steps: Turning a Lightweight into a High-End Weapon
Drivers, Firmware, and Razer Synapse
Technically, the Viper V3 Pro works as a plug-and-play device: plug it in, Windows recognizes it, and off you go. For office use, that’s enough. But anyone who buys this mouse wants more—and that “more” requires Razer Synapse. Razer makes it very clear that Synapse is necessary for advanced features like profiles, macros, DPI stages, or fine-grained sensor tuning.
In practice, the onboarding looks like this:
- Download and install Razer Synapse
- Available on Razer’s website; creating a Razer ID is optional but helpful if you want to sync profiles to the cloud.
- Connect the Viper V3 Pro
- Either via USB-C cable or—more realistically—through the 2.4 GHz HyperSpeed/HyperPolling dongle. The mouse appears in Synapse’s dashboard within seconds.
- Check for firmware updates
- Razer provides firmware updaters for the Viper V3 Pro, improving stability and HyperPolling compatibility. Synapse usually notifies you automatically—sometimes a bit insistently—when an update is available.
The Synapse Interface: Dashboard, Mouse Tab, and Gamer Room
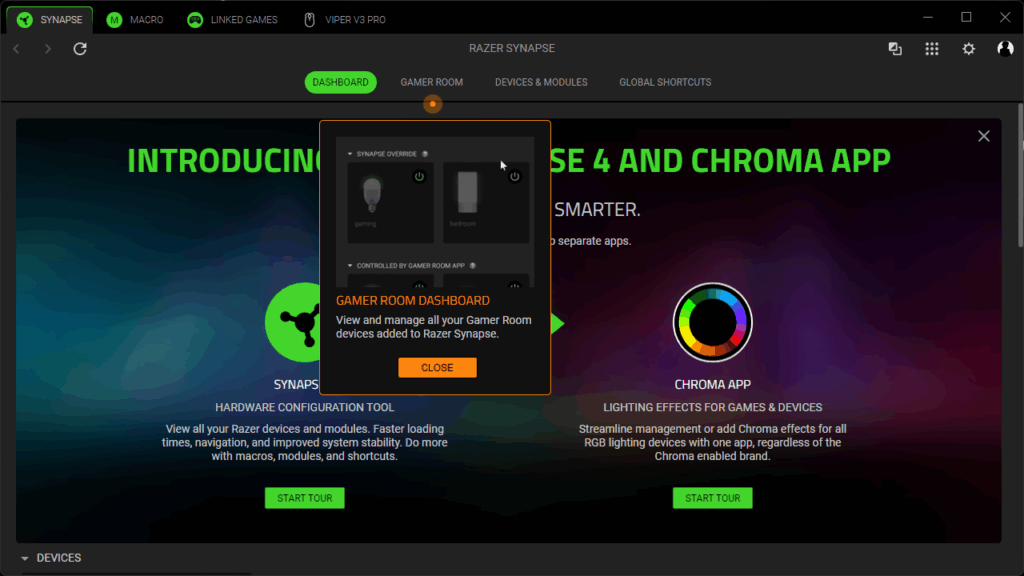
Synapse opens to the Dashboard, a central hub showing every detected Razer device, installed modules, and system features.
- Dashboard:
- Overview of all devices (mouse, keyboard, headset, etc.).
- Quick access to device settings and modules.
- Gamer Room:
- A relatively new concept allowing you to manage which devices Synapse actively controls and how profiles behave across your setup—especially useful with multiple Razer peripherals.
The star of the show is the Mouse Tab for the Viper V3 Pro. This is where everything crucial happens: button mapping, DPI, polling rate, power settings, sensor calibration, and more.
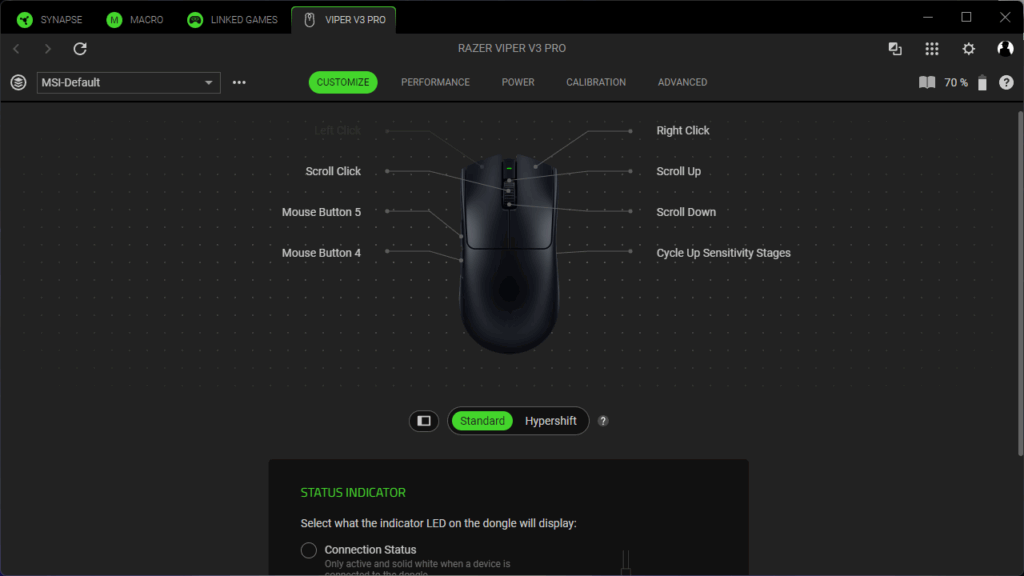
Customize: Button Mapping, Hypershift, and Profile Logic
The Viper V3 Pro offers eight programmable inputs. Synapse’s Customize tab is where each one is reassigned.
Common binding types include:
- Mouse functions (middle click, double-click, forward/back)
- Keyboard commands or combos
- Media controls
- System shortcuts
- Macros
- Text functions
- Disable
Hypershift – A Second Layer for Power Users
Hypershift lets you assign secondary functions to your buttons: hold one designated “Hypershift key” and the entire mouse essentially gains an alternative button layout.
Example:
- Side Button 1: standard = Push-to-Talk, Hypershift = Mute Mic
- Middle click: standard = Ping, Hypershift = Open Map
This turns eight physical inputs into a dozen or more usable commands, without needing extra buttons that would add weight or bulk.
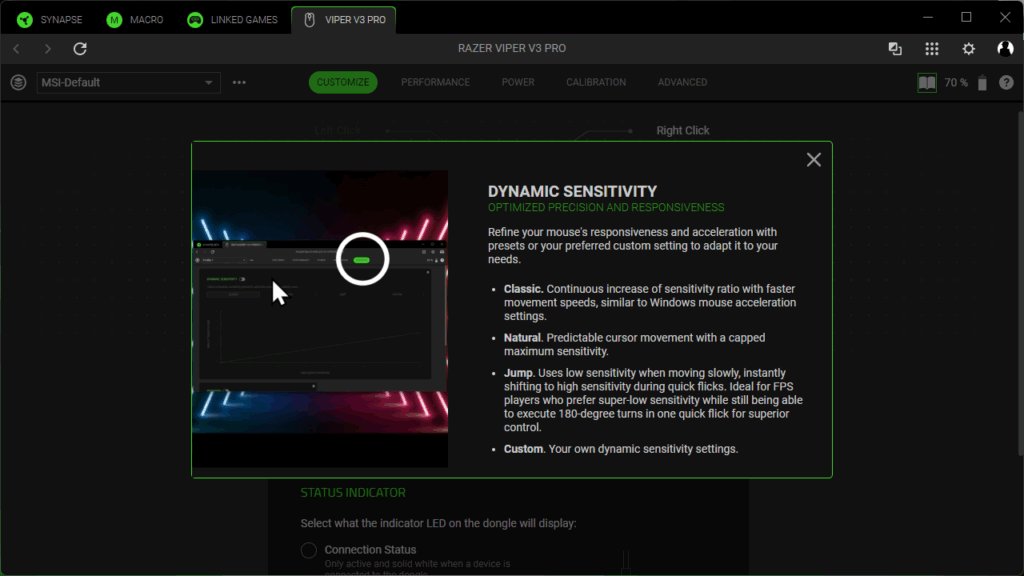
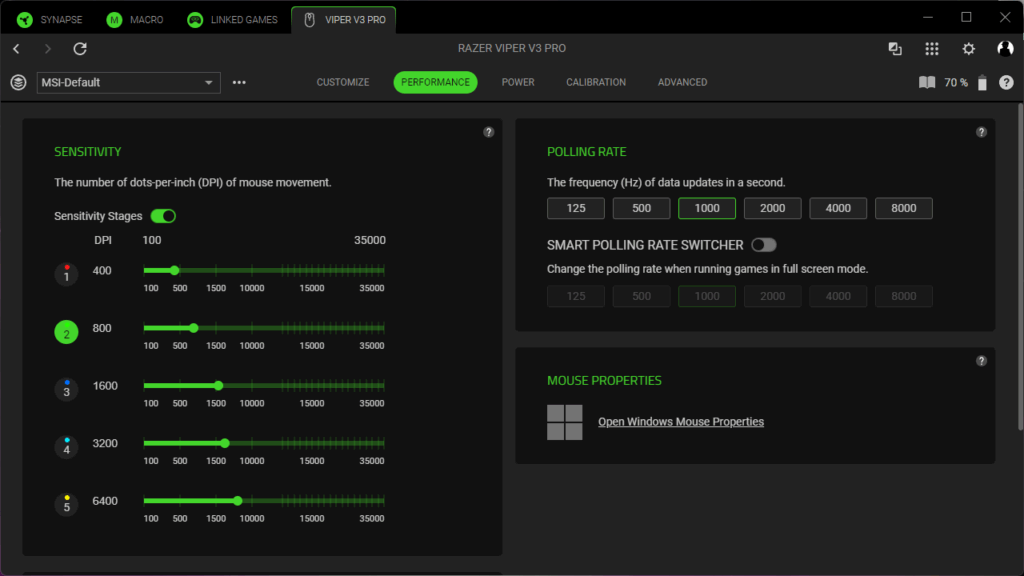
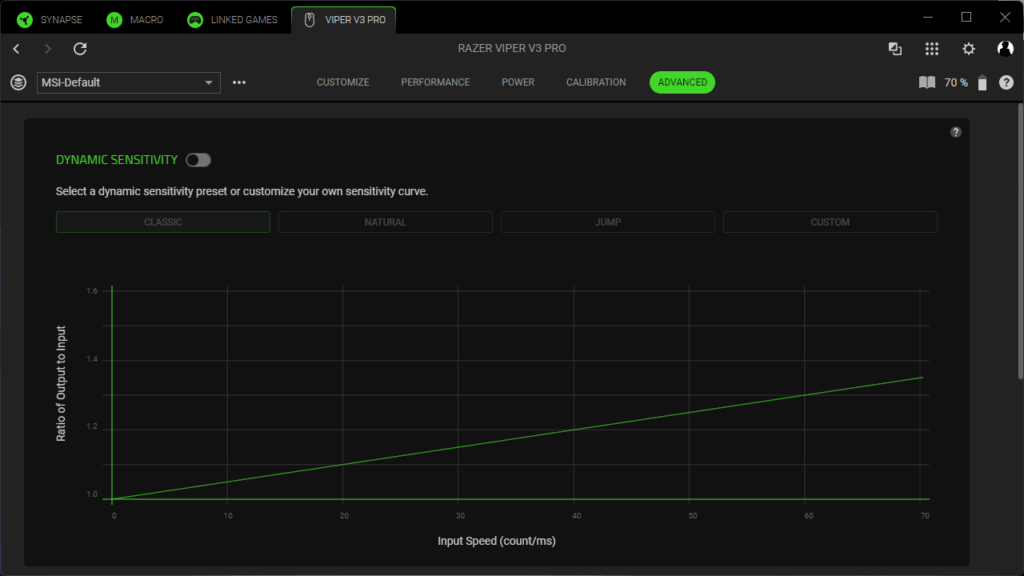
Performance: DPI, Sensitivity Stages, and Polling Rate up to 8000 Hz
Inside the Performance tab, you shape how the mouse behaves at a sensor level. The Viper V3 Pro uses the Focus Pro 35K Optical Sensor Gen 2 with up to 35,000 DPI, 750 IPS tracking speed, and 70 G acceleration.
DPI & Sensitivity Stages
Synapse follows a consistent design across Razer’s mice:
- Enable up to five sensitivity stages
- Assign precise DPI values (e.g., 400 / 800 / 1600 / 3200 / 6400)
- Optionally split X- and Y-sensitivity for specialty use cases
Switching DPI stages is done through a button you choose—often via a Hypershift binding. This setup is ideal for users who need different speeds for desktop work vs. in-game aim.
Polling Rate & HyperPolling Wireless
Polling rate is the number of times per second the mouse reports its position. The Viper V3 Pro supports up to 8000 Hz, but only wirelessly through the HyperPolling Wireless Dongle.
- Standard rates: 125 / 500 / 1000 Hz
- With HyperPolling dongle: 2000 / 4000 / 8000 Hz
- Important: The Viper V3 Pro does not support 8000 Hz via cable (explicitly stated in Razer’s documentation).
8000 Hz reduces the theoretical input delay from ~1 ms at 1000 Hz to ~0.125 ms. Not everyone feels it directly, but on 240-360 Hz monitors with high in-game FPS the cursor becomes noticeably smoother and more “locked in” to the crosshair.
Razer also warns that some older game engines struggle with 8000 Hz—dropping to 4000 or 2000 Hz can improve stability.
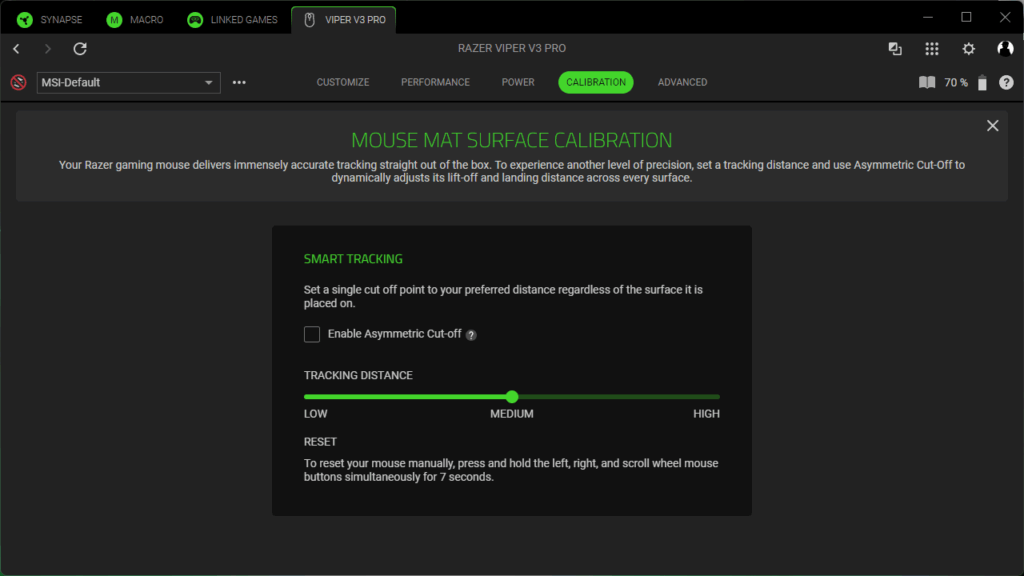
Calibration, Lift-Off Distance, and Surface Adjustment
The Calibration section lets you tune the sensor to your specific mousepad. Synapse provides:
- Presets for Razer mousepads
- Custom calibration for any surface
- Lift-off distance tuning
- Asymmetric cut-off (different values for lift-off and landing)
Low-sense players who frequently reposition the mouse will especially appreciate this. A high lift-off distance can cause the cursor to jump during lifts; the Focus Pro sensor’s fine-grain control prevents this.
This tuning is part of what separates a high-level esports mouse from an everyday device.
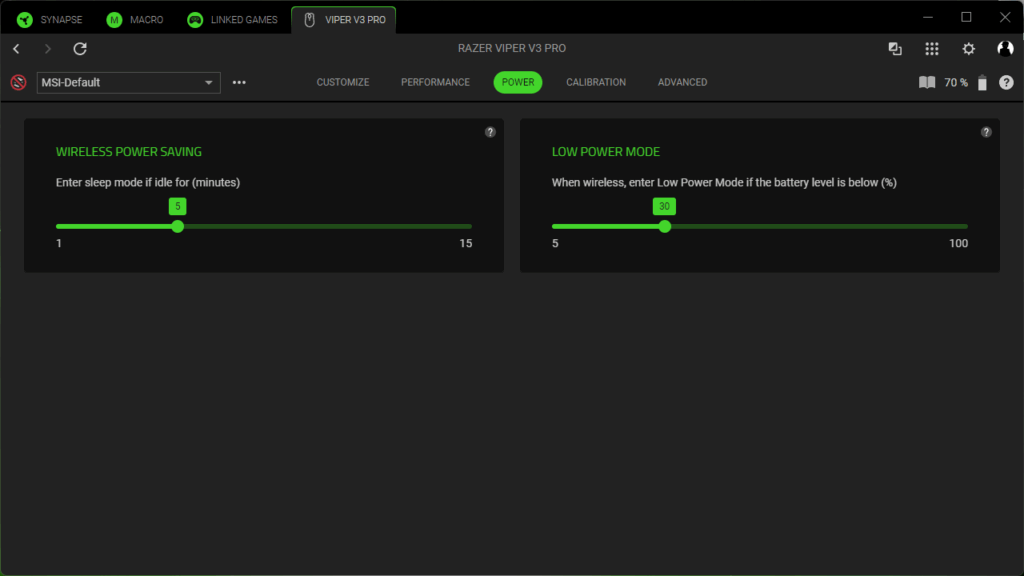
Power Tab: Battery Life vs. Responsiveness
As a wireless mouse, the Viper V3 Pro relies on smart power management. Synapse provides a dedicated Power tab.
Options include:
- Sleep mode timer (1–15 minutes)
- Low power mode threshold (set a percentage at which the mouse begins conserving battery)
- Battery status & notifications
HyperPolling increases battery consumption significantly. Anyone running 4000–8000 Hz will charge more often than a user sticking to 1000 Hz.
A practical setup might look like:
Competitive:
- Sleep: 5 minutes
- Low power: 15–20%
- Polling: 4000–8000 Hz
General use:
- Sleep: 10–15 minutes
- Low power: 30%
- Polling: 1000 Hz
Profiles, Cloud, and Onboard Memory: One Profile, Many Personalities
Synapse profiles can link to applications or games. Launch an app → the assigned mouse profile loads automatically.
Onboard Memory
The Viper V3 Pro includes one onboard profile, storing:
- DPI stages
- Polling rate
- Basic button assignments
Not stored:
- Macros (they require Synapse running on the PC)
This is ideal for tournament PCs or travel setups, where Synapse may not be available but your main settings still load.
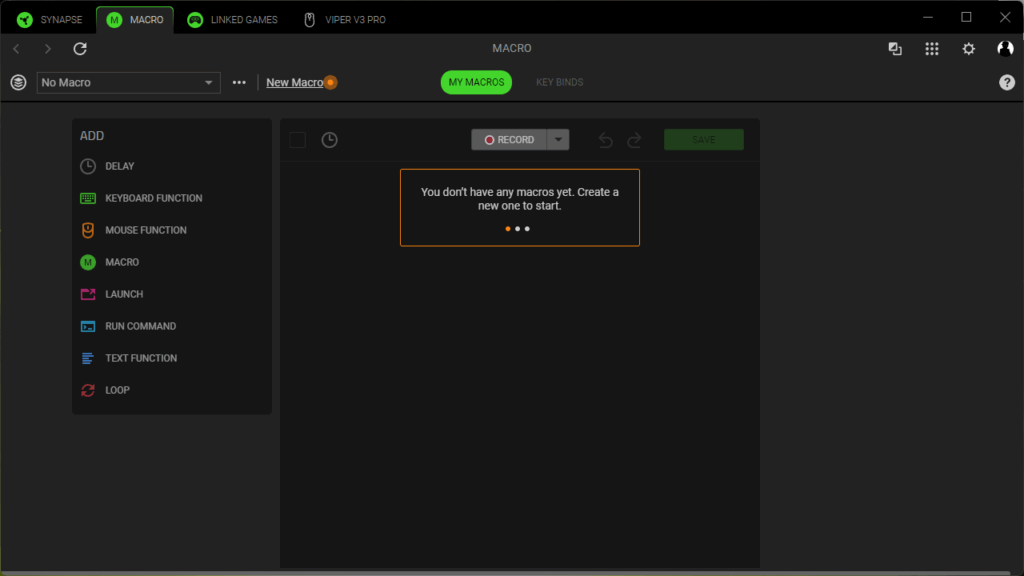
Macros and Automation: A Tool, Not a Crutch
Synapse’s Macro Module allows recording sequences of inputs for productivity or convenience:
- Multi-key shortcuts
- Editor or creative workflow commands
- Chat or inventory macros
But:
- Macros are PC-side, not saved in onboard memory.
- Many competitive games restrict macro usage.
Since the Viper V3 Pro is designed for raw input performance, macros are more of a bonus feature than a core part of its identity.
HyperPolling Wireless Software: Fine Tuning for 8000 Hz
Alongside Synapse, Razer provides a small utility specifically for the HyperPolling Wireless Dongle. It can:
- Verify real-time polling stability
- Identify drops caused by CPU load or software conflicts
- Let users step down to 4000 or 2000 Hz if necessary
Razer even recommends closing background programs during testing to get accurate readings. The tool is simple but effective—especially for enthusiasts who want measurable proof that 8000 Hz works consistently.
Optical vs. Mechanical Switches – Why the Viper V3 Pro Clicks the Way It Does
Even though it’s technically a hardware topic, understanding Razer’s Gen-3 Optical Switches helps clarify why Synapse doesn’t offer certain debounce or click-delay settings.
Razer’s optical switches are rated for 90 million clicks, with activation latency as low as ~0.2 ms, and aim to eliminate double-click issues.
Traditional Mechanical Switches
Mechanical switches use a metal contact that physically closes during a click. This causes:
- Contact bounce
- Required debounce filtering
- Wear-related double-click issues over time
The debounce filter introduces delay—tiny, but measurable—something esports players obsess over.
Optical Switches
Optical switches register clicks by interrupting an infrared beam, not by touching metal.
Advantages:
- No bounce → no heavy debounce filtering
- More consistent click response
- Increased durability
- Lower and more stable latency
Razer positions these switches as a major factor behind the Viper V3 Pro’s responsiveness. Combined with HyperPolling, they provide extremely stable click timing without the jitter or inconsistency mechanical switches can introduce.
What This Means for Software
Because there’s no mechanical bounce:
- No debounce tuning menu needed
- More consistent input data
- Cleaner integration with 8000 Hz polling
- Less risk of software-side filtering artifacts
In essence, the hardware gives the software cleaner signals to work with.
Practical Use Cases: Fine-Tuning for Esports, Work, and Creativity
The strength of Synapse is that it offers deep customization without feeling overwhelming. Once you set up your profiles, switching between them becomes effortless.
1. Esports FPS Profile
- DPI: 800–1600
- Polling: 4000–8000 Hz
- Lift-off distance: lowest possible
- Buttons: utilities, Hypershift for secondary bindings
- Power: aggressive performance mode
2. General Use / Office & Gaming Profile
- DPI: 1200–2400
- Polling: 1000 Hz
- Macros: productivity shortcuts
- Power: relaxed sleep timer
3. Creativity & Editing Profile
- DPI: 2400–3200
- Buttons: macro-shortcuts for tools and timeline controls
- Polling: 1000 Hz
Synapse becomes a profile-driven personality switcher for the Viper V3 Pro—turning one mouse into multiple specialized tools.
(Not a Final Verdict—Just the Software Perspective)
A full conclusion belongs elsewhere in your review, but the essence is simple:
- The hardware offers the potential.
- The software unlocks it.
- From sensor tuning to HyperPolling to power management, Synapse transforms the Viper V3 Pro into a finely adjustable, highly responsive tool.
- The combination of optical switches, the Focus Pro sensor, and a clean software stack results in one of the most consistent low-latency setups available today.
The hardware delivers the signal.
The software ensures it lands exactly where you want it.
Note in accordance with EU transparency regulations:
The Razer Viper V3 Pro featured in this review was provided to us by Razer as a non-binding loan for testing purposes. This is not paid advertising. Razer had no influence on the content, assessment, or editorial independence of this article. All opinions expressed are based solely on our own hands-on experience. We sincerely thank Razer for providing the mouse and for their trust in dataholic.de.