MSI MPG 272URX QD-OLED: Unboxing – From the Massive Box to the First Power-Up
- Introduction: A Package That Builds Anticipation
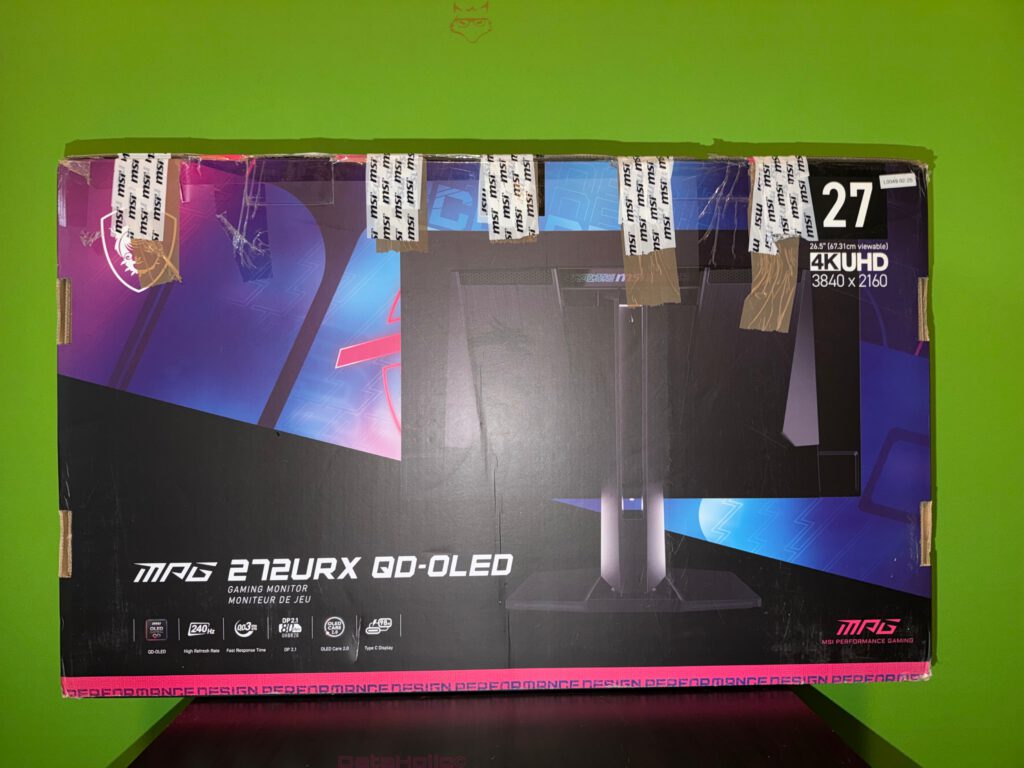
- The Box: Seals, Safety, and First Impressions
- Inside: Lifting the Lid
- What’s in the Box – Clean and Minimal
- Removing the Panel Safely
- The Stand: Weight, Stability, and Smart Design
- Panel & Frame: Protection, Build, and Finish
- Assembly: Three Simple Steps
- Build Quality: What the Hands Tell
- First Power-On: The OLED Awakens
- Cable Management: Order from the Start
- Side Profile: Slim, Balanced, Precise
- Documentation: Short and Clear
- The Sensory Side: Sound and Smell
- Desk Space & Practical Fit
- Keeping the Packaging
- Common Pitfalls to Avoid
- First Visual Impressions: Minimalist Front, Gamer Rear
- Controls: First Interaction
- Outlook (Without Verdict): What the Unboxing Promises
- Quick Unboxing FAQ
“Details matter.” – Steve Jobs
“Form follows function.” – Louis Sullivan
Introduction: A Package That Builds Anticipation
It’s that moment every tech enthusiast and reviewer knows well: the doorbell rings, the delivery arrives, and a large box lands on the desk. With the MSI MPG 272URX QD-OLED, “large” isn’t an exaggeration. The 27-inch monitor comes in a correspondingly substantial box designed to appeal directly to its target audience: bold gaming aesthetics, vivid colors, technical badges, and, prominently displayed, the promises of 4K UHD (3840 × 2160), QD-OLED, and 240 Hz. These are keywords that, even without diving into the spec sheet, tell you exactly what this product aims for: a high-end display combining sharp image quality with ultra-fast performance.
But before we dive into benchmarks, calibration curves, or software menus (that’s for the full review), today we’re focusing solely on the unboxing experience. How is the monitor packaged? What’s included? How does the assembly go, and what should you be aware of when handling a delicate OLED panel? This article documents every step — from cutting the seals to the first power-on — complete with notes, impressions, and a few timeless quotes that resonate with design and technology enthusiasts alike.
“Good design is as little design as possible.” – Dieter Rams
The Box: Seals, Safety, and First Impressions
The front of the box serves both as a stage and a checklist. On the left, the MSI dragon logo, on the right, a bold “27” and the resolution 4K UHD – 3840 × 2160. Along the bottom edge runs a bar of icons highlighting the monitor’s key selling points: QD-OLED, high refresh rate, fast response time, DisplayPort, OLED Care 2.0, and Type-C Display. It’s a teaser that sets expectations without overselling.
Several white MSI security seals keep the box closed. They’re not decorative — they’re placed strategically so that any tampering would be obvious. A reassuring detail, especially for something as fragile as an OLED panel. The side carry handles are built into the cardboard, making it easier to lift and move. Still, we recommend having a second pair of hands — not because of excessive weight, but because OLED panels hate point pressure. One wrong grab can ruin the day. Always lift by the frame, never by the panel surface.
Inside: Lifting the Lid
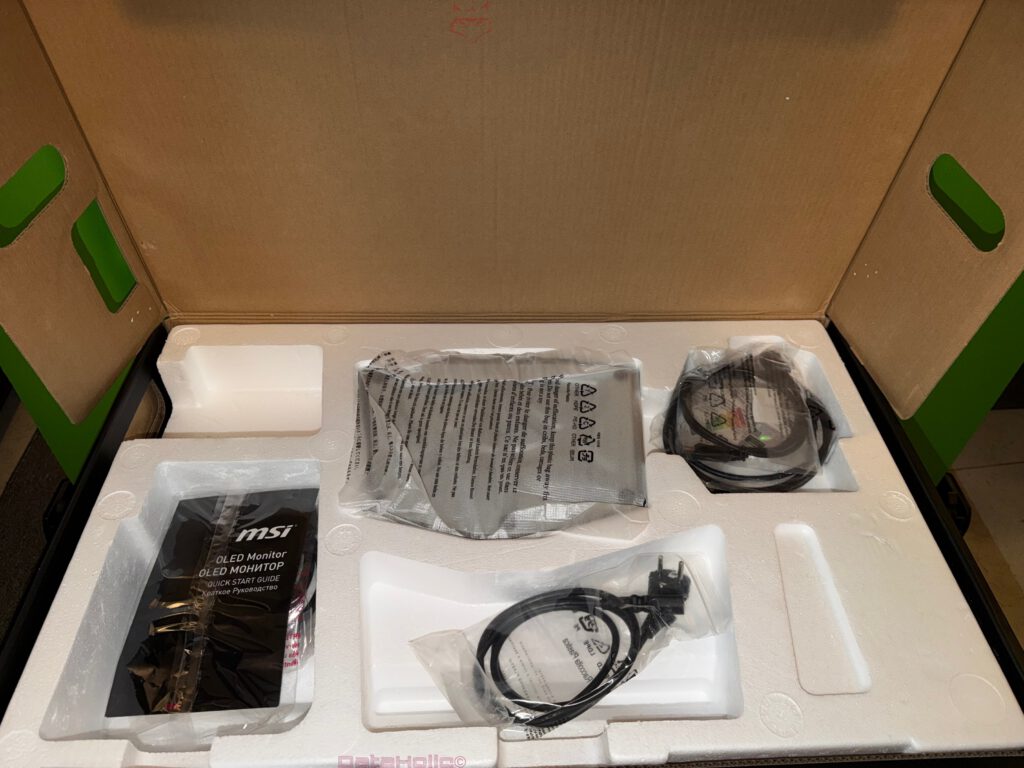
Once the seals are cut, the top lid opens to reveal a custom-shaped Styrofoam shell covering the entire contents, with neatly molded compartments. This is standard in high-end monitors, but the precision here is worth noting — everything fits snugly without being jammed.
The top layer holds the accessories:
- One power cable (Schuko plug),
- Two signal cables (in our review unit — typically DisplayPort, HDMI, or USB-C depending on region),
- A Quick Start Guide and warranty documentation, both in separate pouches.
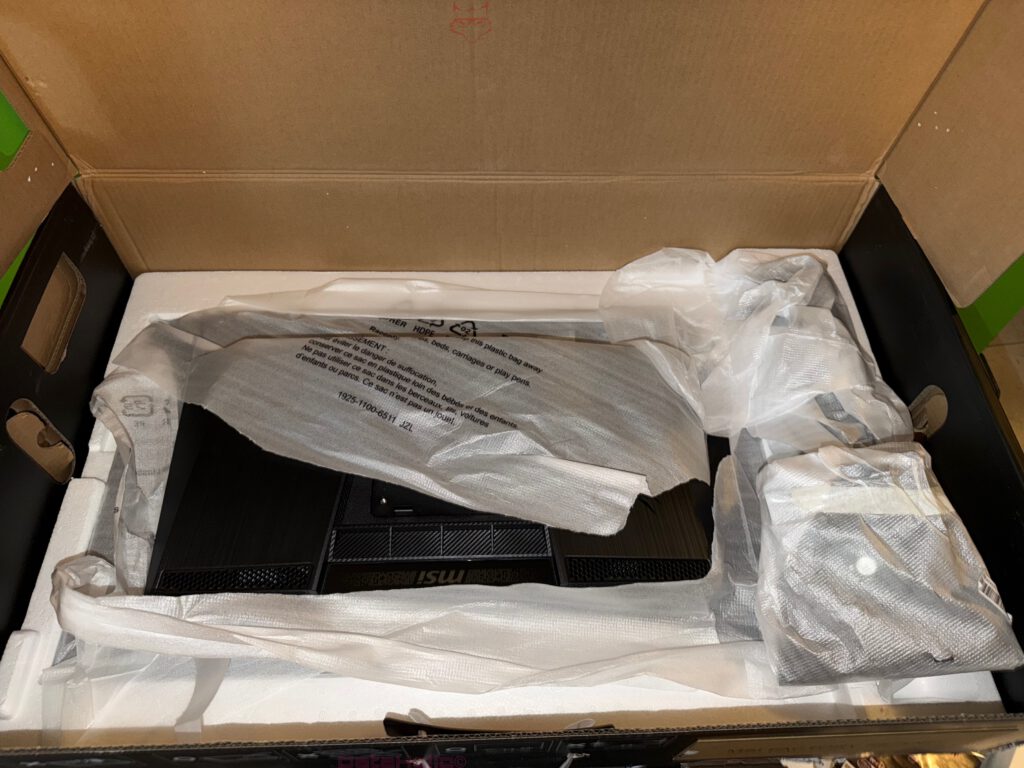
Beneath this lies the second Styrofoam layer, containing the panel, stand base, and stand arm, each carefully wrapped in fabric-style protective sleeves and additional plastic film. Right away, MSI earns points for simplicity — no scattered screws or confusing parts. The stand can be assembled without tools, as we’ll show below.
“Simplicity is the ultimate sophistication.” – attributed to Leonardo da Vinci
What’s in the Box – Clean and Minimal
Included Components:
- MSI MPG 272URX QD-OLED monitor panel
- Stand assembly (base and arm, preassembled or tool-free connection)
- Cables: Power + two signal cables (varies by region)
- Documentation: Quick Start Guide, warranty info
No more, no less. Notably, there’s no external power brick, which suggests an internal power supply — a big plus for cable management and desk aesthetics.
A Note on the Cables
Exact cable types vary by market, but here’s the rule of thumb:
- Use DisplayPort for PCs with modern GPUs.
- Use USB-C for laptops with display output.
- Use HDMI for consoles or AV setups.
Choose based on your intended setup, not just what’s in the box — and always ensure your cable supports the required bandwidth.
Removing the Panel Safely
OLED panels are extremely sensitive to pressure and torsion. Here’s the safest step-by-step approach:
- Clear your workspace. Wipe the surface clean, make sure there’s room to maneuver.
- Lay the box flat before opening — don’t stand it upright.
- Remove accessories first to free space.
- Take out the stand components and place them nearby.
- Lift the panel by the frame, ideally with two people — one on each side.
- Tilt the box gently so you can slide the panel out horizontally.
- Keep the protective sleeve on until the panel rests on a soft, flat surface. Only then remove the wrapping and film.
“Safety first is safety always.” – Charles M. Hayes
The Stand: Weight, Stability, and Smart Design
The stand is the monitor’s handshake — your first tactile impression. The broad, angular base of the MPG 272URX feels heavy and solid, giving the monitor the stability it needs. The stand arm locks into the base with a simple snap mechanism — tight and secure, no wobble. The upper section houses the VESA quick-release mount, allowing you to attach the monitor without screws. Anyone who’s ever tried balancing a monitor while fumbling for screws will appreciate this feature immensely.
The rear cable routing hole is a subtle but functional touch. It’s not oversized, but large enough to handle power and data cables neatly — small design decisions like this make all the difference once the monitor is set up.
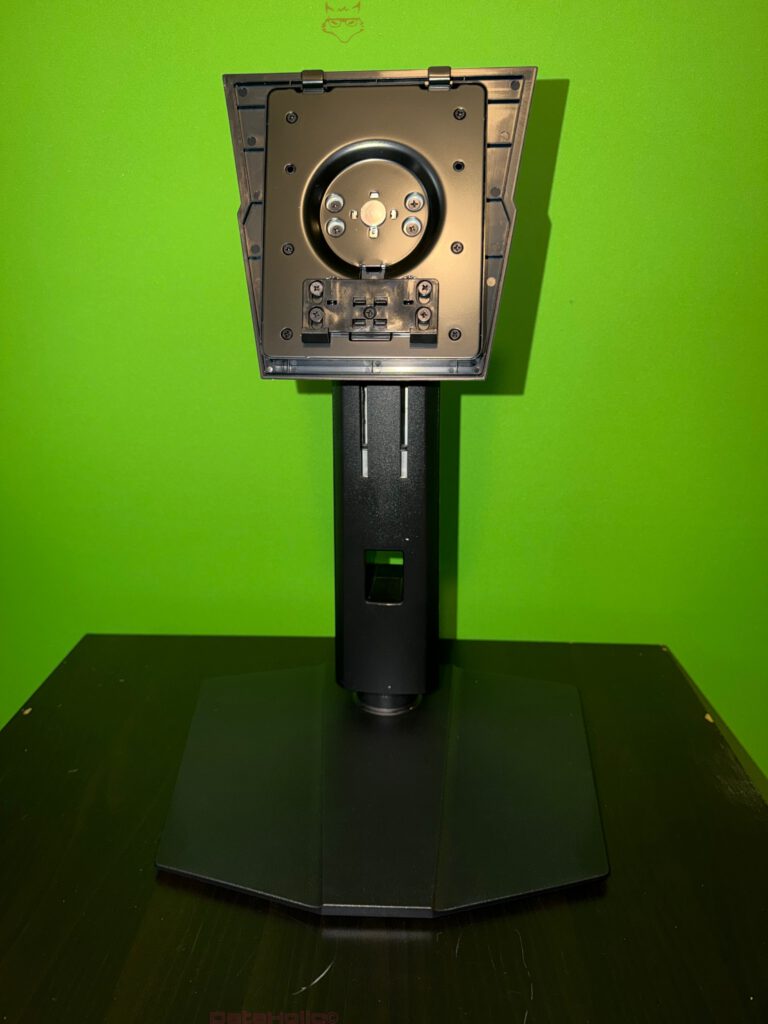
Ergonomics at a Glance
Even before powering on, the stand reveals solid ergonomics: height adjustment and tilt are supported and feel smooth, with just the right amount of resistance. Swivel is possible to a degree — not for full rotation, but perfect for everyday adjustments. The pivot function (portrait mode) remains to be verified in the full review. For now, what’s clear is that the mechanics are sturdy, the balance excellent, and the setup intuitive.
“Stability isn’t flashy, but it’s comforting.” – anonymous engineer
Panel & Frame: Protection, Build, and Finish
The panel comes in a semi-transparent protective sleeve, with a thin front film to protect the surface. Don’t rush the unwrapping — peel slowly from one corner, keeping the film flat to avoid static buildup or reattachment.
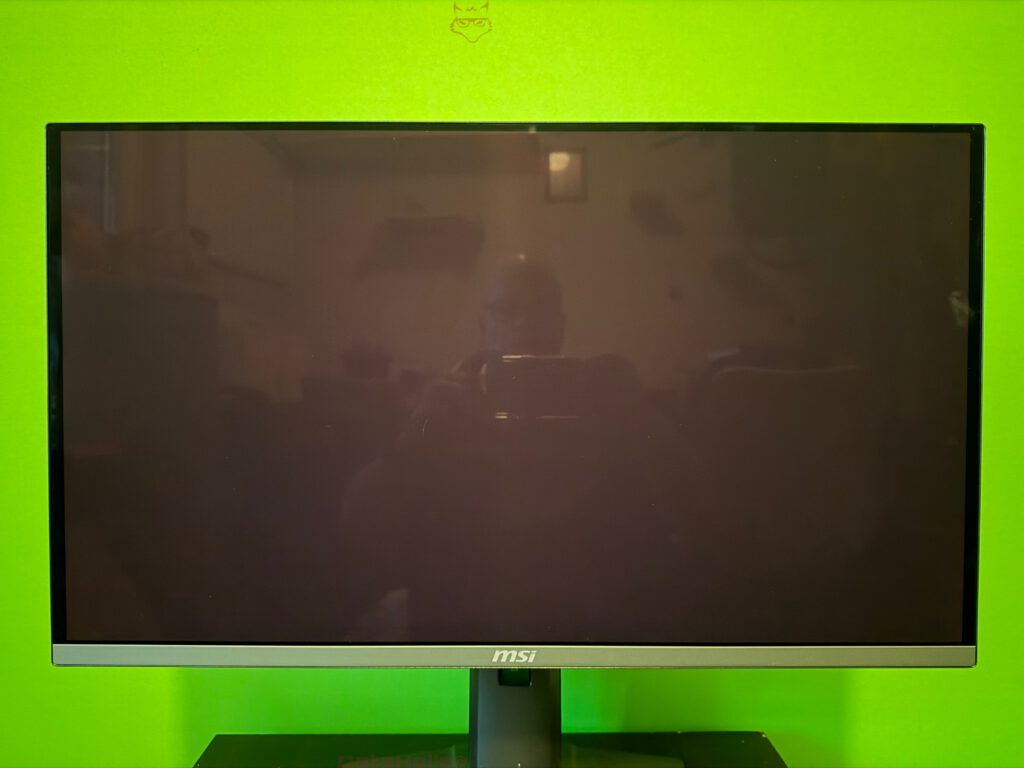
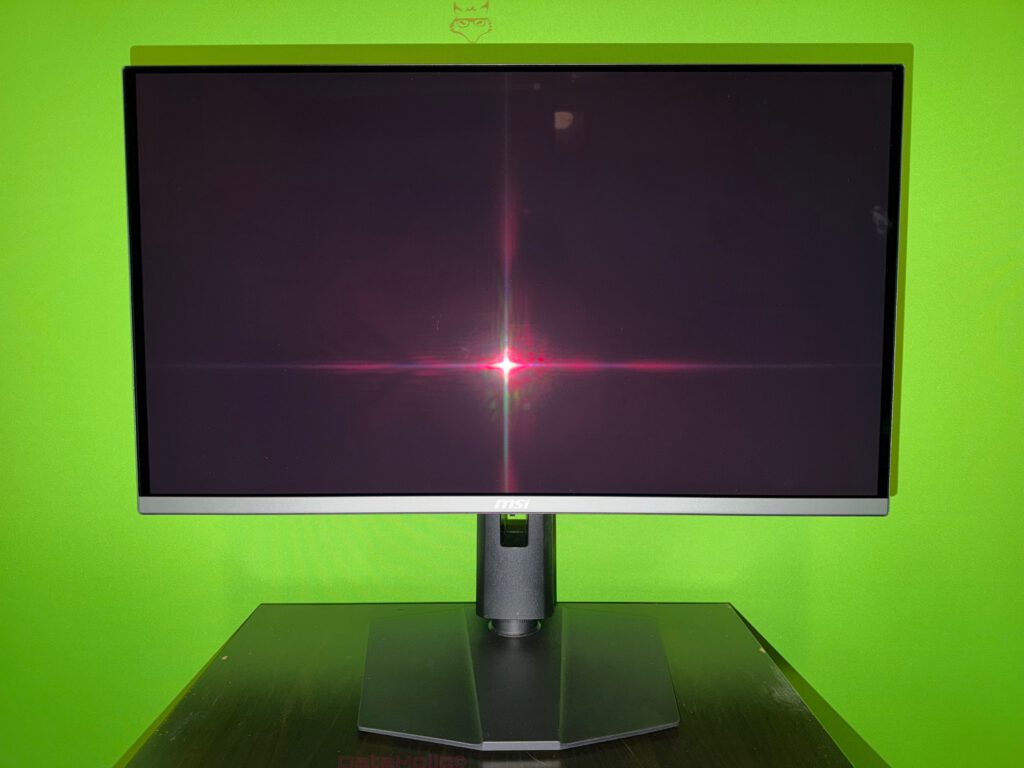
The front bezel is minimal on all sides, with a slightly thicker bottom bar featuring the MSI logo. The panel surface appears glossy with an anti-reflective coating — typical for premium OLEDs. In flash photography, the reflection produces a striking starburst effect, but in real life, this is simply a clean, contrast-rich display.
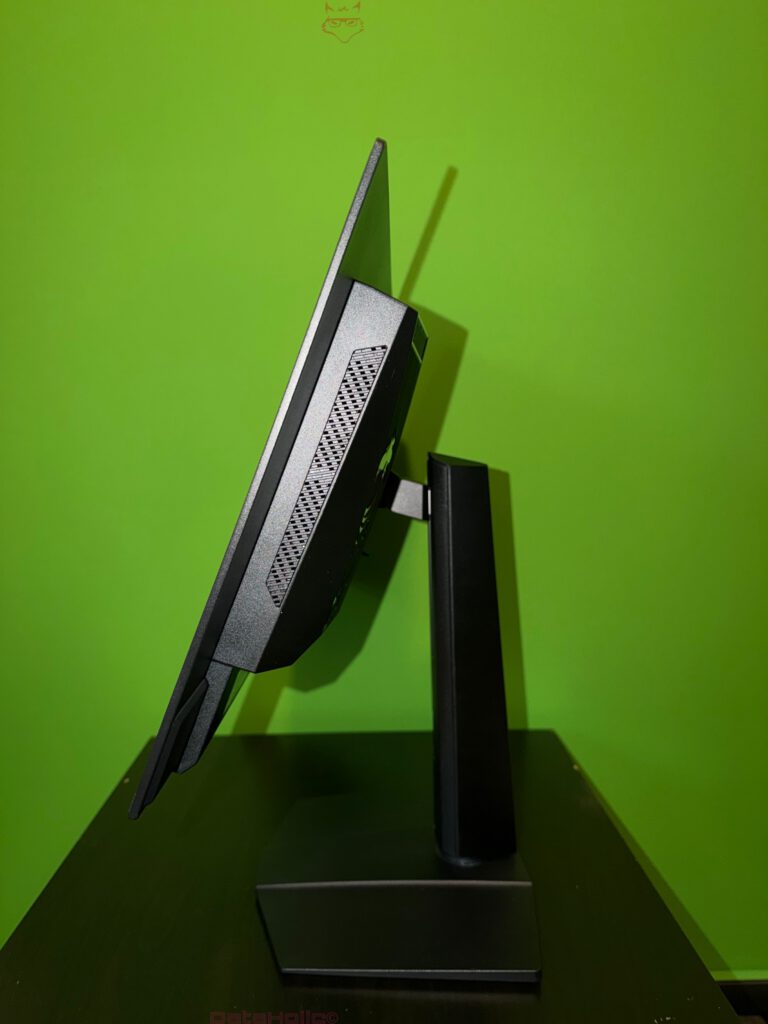
The rear housing features MSI’s faceted gamer design with venting slits near the top. The ports face downward for better cable concealment — power, DisplayPort, HDMI, USB-C, and others depending on the model. All are easily accessible once the monitor is on the stand.
Assembly: Three Simple Steps
- Place the base on the desk, attach the arm (if not preassembled).
- Align the monitor and snap it onto the VESA quick-release until it clicks.
- Remove protective film, thread cables through the cable hole, and plug in power and signal cables.
The entire process takes just a few minutes — no tools, no stress. That’s how unboxing should be.
“If you can’t explain it simply, you don’t understand it well enough.” – attributed to Albert Einstein
In tech terms: If assembly is complicated, the design wasn’t good enough.
Build Quality: What the Hands Tell
A tactile inspection speaks volumes. With clean hands, we run fingertips along the edges, lightly press (on the frame, never the panel), and check for gaps or creaks. Result: even panel fit, no flex, no squeaks. The base feels reassuringly heavy; its matte finish resists fingerprints. The arm has a slightly textured surface that hides scratches. Everything feels solid, without unnecessary ornamentation.
The rubber feet underneath the base are well-chosen — they grip the desk firmly but allow gentle repositioning. A thoughtful detail that quietly improves everyday usability.
First Power-On: The OLED Awakens
Pressing the power button triggers a soft glow from the standby LED, followed by the deep black of OLED as the panel powers up. Our photo with the red flare captures the flash reflection, not the panel output — in normal lighting, the screen is calm, inky, and strikingly uniform. Even at this early stage, the OLED advantage is evident: black is truly black.
We’ll reserve color accuracy, HDR behavior, and motion handling for the full review. For now, everything powers up flawlessly — a reassuring start.
A Quick Word on OLED Care
The packaging proudly advertises “OLED Care 2.0” — MSI’s protection suite against image retention and burn-in. Without touching menus, a few universal guidelines apply:
- Take breaks during long static sessions.
- Enable a screensaver or auto power-off.
- Avoid maximum brightness for extended periods.
“Prevention is better than intervention.” – every good service manual ever
Cable Management: Order from the Start
The unboxing stage is the perfect time to plan cable management. The stand’s routing hole keeps things tidy — but remember: don’t over-tighten. OLED monitors dislike cable tension. Leave a gentle curve in your cables to prevent stress on connectors.
Use two Velcro ties — one behind the stand, one under the desk — for a clean yet flexible setup.
Label Your Cables
If you switch sources often (e.g., PC, laptop, console), small labels at each end (“DP PC,” “HDMI PS5,” “USB-C NB”) save time and frustration.
Side Profile: Slim, Balanced, Precise
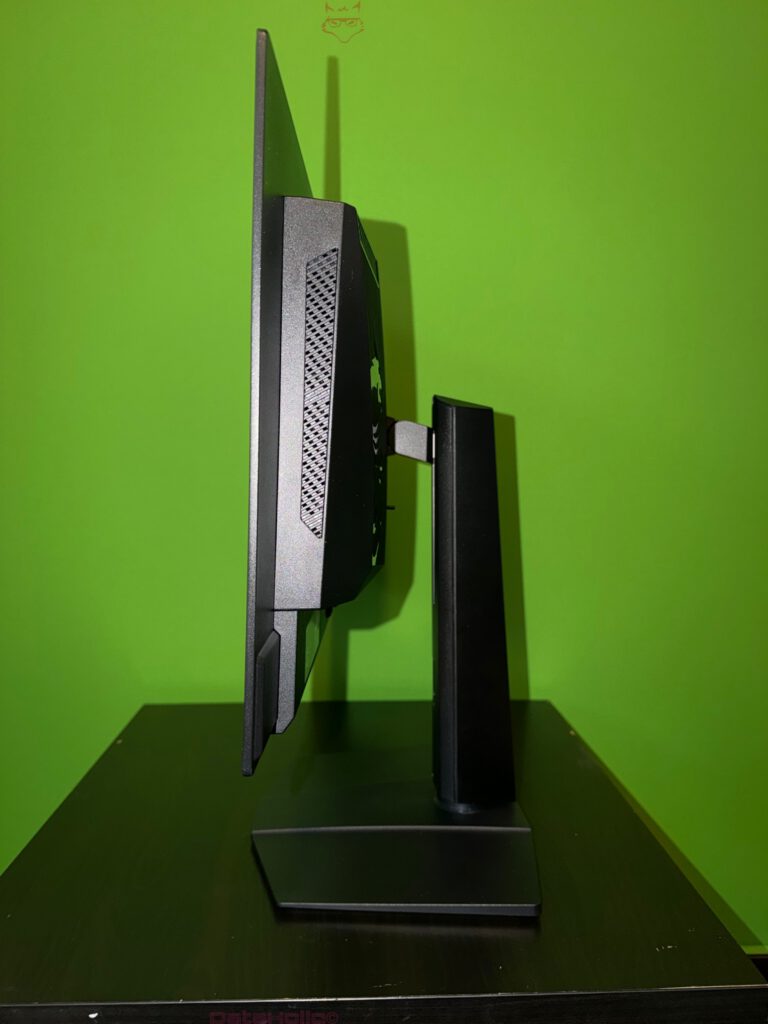
From the side, the MPG 272URX demonstrates just how thin modern OLEDs have become. The panel is razor-slim, with a slightly thicker electronics section housing ports and the power supply. The tilt mechanism operates through a central hinge that’s smoothly damped — no jerky motion, just steady resistance. The monitor doesn’t “fall” into position; it glides there.
“Smooth is fast.” – motorsport proverb
Documentation: Short and Clear
The Quick Start Guide sticks to the essentials: diagrams for unboxing, assembly, and cable connection. For more advanced settings (menus, features), it points users to MSI’s website. For an unboxing guide, that’s exactly right — too much text would only get in the way.
The Sensory Side: Sound and Smell
Unboxing is a sensory ritual. The Styrofoam squeaks, the film crackles, and the box has that faint “new electronics” scent that fades within hours. Importantly, there’s no strong odor or fan noise when powered on. OLEDs are silent by design, and here too, everything is blissfully quiet.
Desk Space & Practical Fit
The footprint of the stand strikes a good balance — broad enough for stability, shallow enough not to eat half your desk. Keyboard and mouse users will appreciate the angled base corners, which allow close placement without obstruction. The height-adjustable arm provides ample range while keeping the center of gravity steady.
For VESA Mount Users
Thanks to the quick-release system, switching to a monitor arm later is simple. Still, we recommend setting up the monitor on its stand first — check alignment, ergonomics, and port placement before mounting permanently.
Keeping the Packaging
Don’t throw the packaging away. The box and custom Styrofoam inserts are perfectly shaped for reuse — ideal if you need to move or store the monitor. Keep the foam sleeves and films as well. A practical tip: label the box (“Front,” “Top,” “Accessories”) for easy repacking later.
“Take care of your tools and they will take care of you.” – proverb
Common Pitfalls to Avoid
- Peeling film too fast: Static attracts dust. Go slow and steady.
- Touching the panel: Fingerprints are minor; pressure damage isn’t. Always grip by the frame.
- Over-tight cables: Leave slack to protect the ports.
- Placing items on the screen: Never — not even briefly.
- Uneven desk surfaces: Can cause panel flex. Always build on a flat, stable surface.
First Visual Impressions: Minimalist Front, Gamer Rear
From the front, the MPG 272URX looks clean and professional — slim bezels, a subtle MSI logo. From the back, it’s more distinctly gamer-inspired, with angular venting and MSI’s recognizable aesthetic. It strikes the right balance between elegance and personality — serious enough for work, bold enough for play.
Controls: First Interaction
Even without powering into menus, you’ll find a joystick controller on the back, positioned perfectly for the right hand. It’s tactile, clicky, and intuitive — confirming MSI’s consistency in design. We’ll explore the OSD in the main review, but first impressions: it just works.
Outlook (Without Verdict): What the Unboxing Promises
After unpacking, one takeaway dominates: attention to detail. The box is secure, the interior thoughtful, the setup tool-free and stress-free. Build quality inspires confidence, the design blends understated professionalism with gaming DNA, and the first power-on hints at contrast-rich visuals ahead.
Everything works on the first try — no fuss, no frustration. That’s what a good unboxing experience should deliver: confidence and curiosity for what comes next.
“The beginning is the most important part of the work.” – Plato
In this case: the start was promising.
Quick Unboxing FAQ
Do I need tools for assembly?
No. The stand and panel snap together without screws.
Can I build it alone?
Yes, though a second person helps when lifting the panel.
What cables are included?
Power cable and two signal cables (types vary by region).
Is there an external power brick?
No, the power supply is internal.
Is the OLED panel fragile?
Yes — avoid pressure or twisting. Always handle by the frame.
How long does setup take?
Only a few minutes in a calm, careful manner.
Should I keep the packaging?
Absolutely — it’s perfect for safe transport or storage.
Transparency Note (per EU regulations):
The MSI MPG 272URX QD-OLED featured in this review was provided to us by MSI as a temporary loan unit for testing purposes. This is not paid advertising.
MSI had no influence on the content, evaluation, or editorial independence of this article. All opinions are based solely on our own practical experience.
We would like to sincerely thank MSI for providing the monitor and for their trust in dataholic.de.