MSI MAG B850 TOMAHAWK MAX WIFI II – Technical Unboxing
Arrival and First Impression of the Packaging
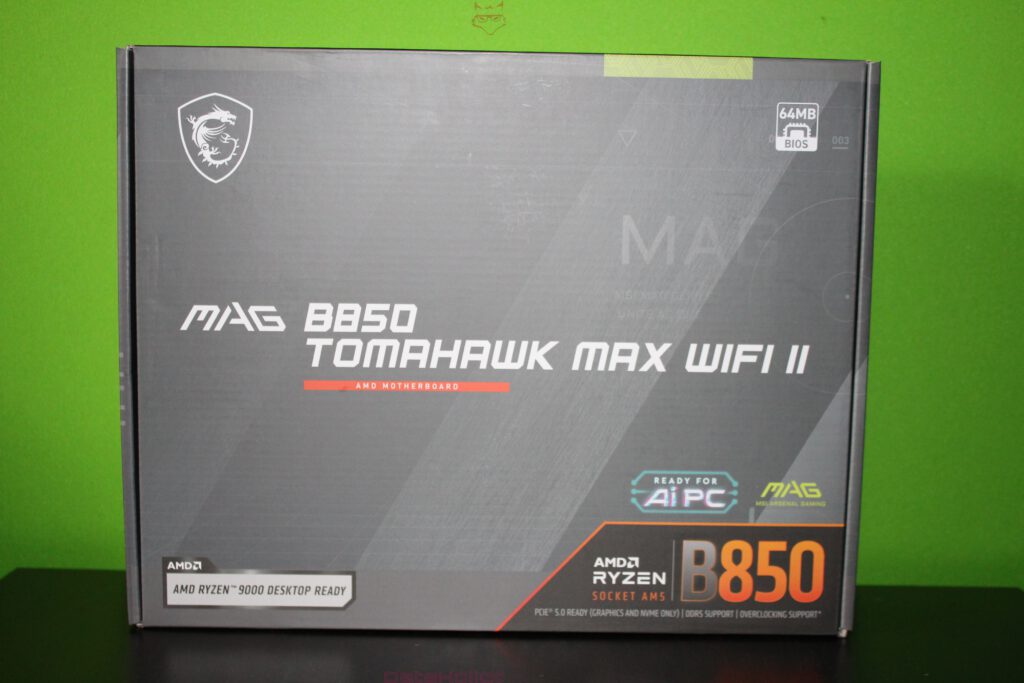
The outer packaging already sets the tone: no colorful overpromising, but a dark, technically inspired design with clear series identification. “MAG” has stood at MSI for years as a kind of workhorse class, meaning boards that focus on a robust foundation, clean layouts, and practical usability. The front prominently displays the model name, flanked by the usual hints regarding platform and intended use. Particularly noticeable is the focus on the new AM5 generation: the label “AMD Ryzen 9000 Desktop Ready” explicitly signals the target audience, namely those who want to jump straight into current CPUs without first having to perform BIOS gymnastics. At the same time, a “64MB BIOS” badge stands out, which is less of a marketing flourish and more of a tangible technical indicator: BIOS size is not a glamorous topic, but it becomes a real comfort factor when it comes to feature scope, microcode updates, graphical interfaces, and long-term maintenance.
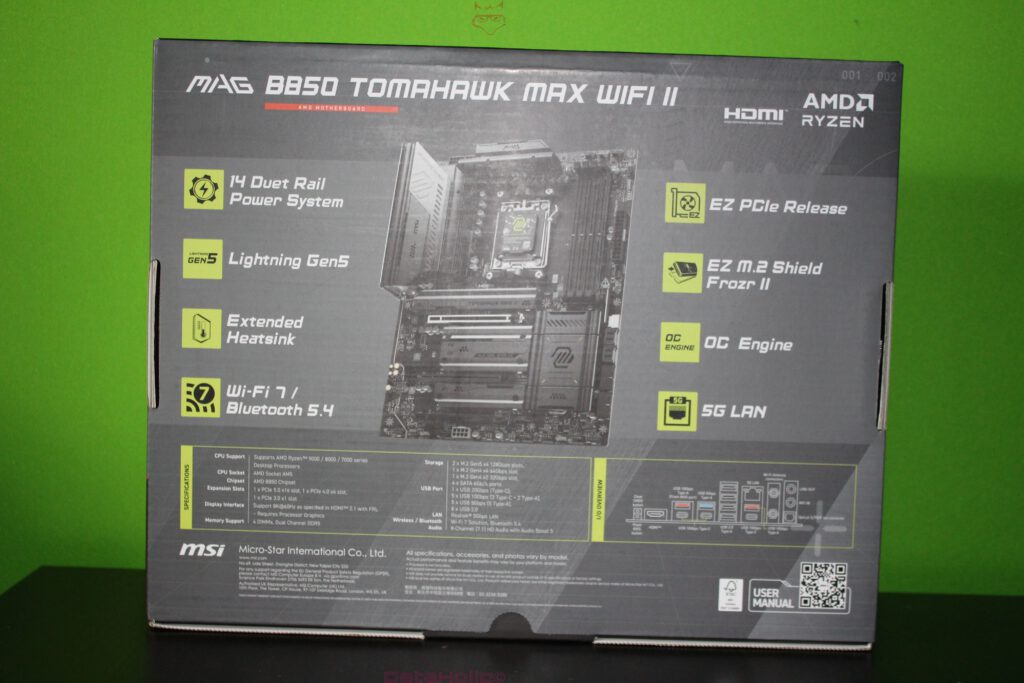
The back of the packaging is significantly more information-dense. MSI lists the central feature clusters that define the board in everyday use: “14 Duet Rail Power System,” “Lightning Gen5,” “Extended Heatsink,” “Wi-Fi 7 / Bluetooth 5.4,” “EZ PCIe Release,” “EZ M.2 Shield Frozr II,” “OC Engine,” and “5G LAN.” This is a mix of hard specifications and MSI’s own comfort-oriented terminology. For an unboxing, it is particularly interesting how consistently these buzzwords later manifest themselves in the physical execution: heatsink geometry, slot mechanics, shielding, connectors, screw points, and small mechanical conveniences. This is precisely where the difference emerges between “printed on the box” and “feels good during the build.”
In between, a thought that repeatedly fits when dealing with hardware: Arthur C. Clarke is often quoted as saying, “Any sufficiently advanced technology is indistinguishable from magic.” This is not magic here, but good motherboards appear similar to outsiders: lots of black surface, many lines, many covers – and in the end, an inconspicuous detail such as a clip, an offset header, or a clearly labeled pin block decides whether the build process is smooth or turns into frustration.
Packaging Structure and Protection Concept
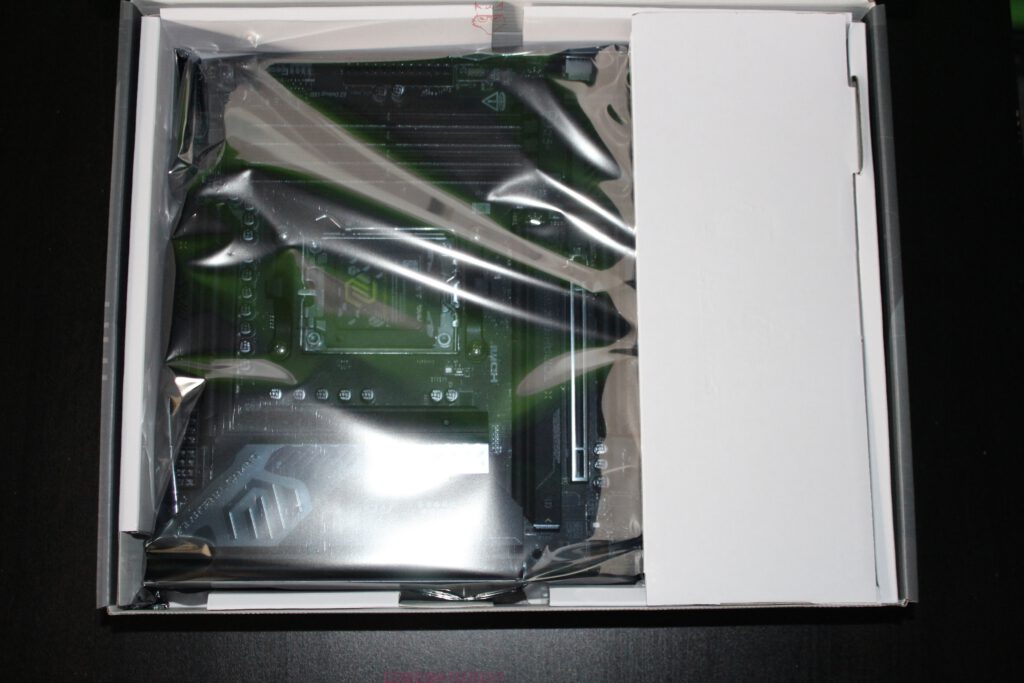
Upon opening, a classic MSI layout becomes apparent: the board rests inside an antistatic protective sleeve and is guided within the cardboard packaging in such a way that neither slot brackets nor heatsink edges press against the carton. This is not luxury, but a necessity, because modern ATX boards with large heatsinks, covers, and tall components present numerous potential stress points. The inner packaging uses partitions and support surfaces that keep the PCB elevated and stabilized. This prevents shipping pressure from acting directly on sensitive areas such as DIMM slots, VRM heatsink edges, or the I/O cluster.
Another detail stands out: the board is not “loose” but perceptibly fixed in place. This is especially important for boards with heavy heatsinks, because micro-movements over long transport routes can generate unfavorable leverage forces. In practical terms, this means less risk of hairline cracks in solder joints at mechanically stressed points and less strain on components that protrude from the board’s surface. It is unspectacular, but exactly the kind of “invisible quality” that ultimately determines whether there is frustration or peace of mind.
Included Accessories and Purpose-Driven Paperwork
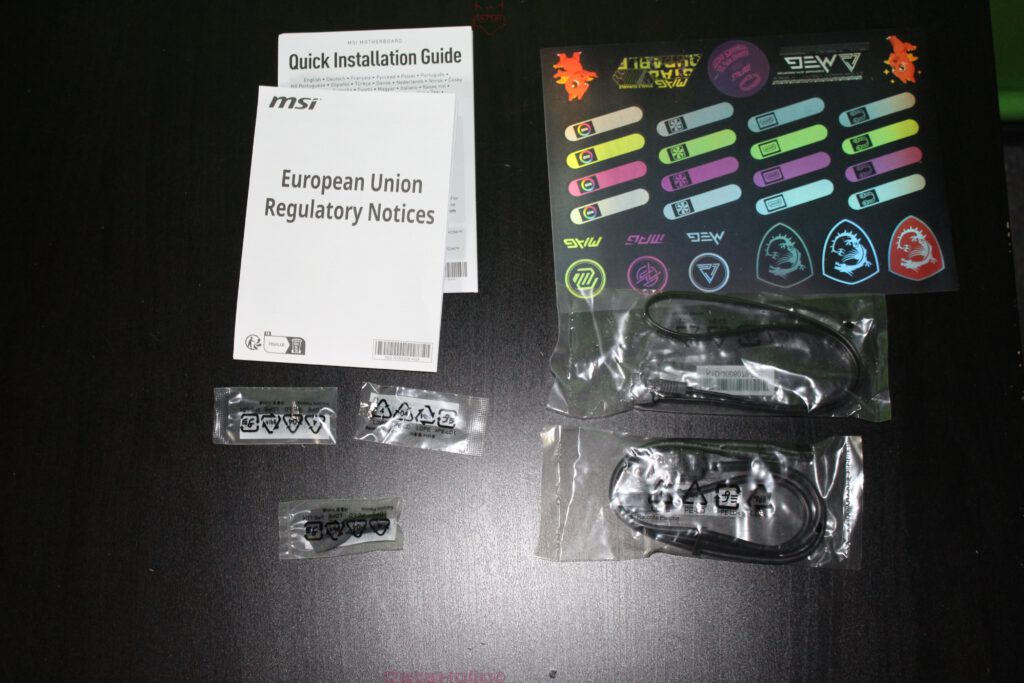
The accessory section appears tidy and typical of current motherboard packages: documentation, regulatory notices, a sticker sheet, and the necessary connection cables. It is noticeable that MSI continues to maintain a clear separation between “mandatory paperwork” and “useful paperwork.” The Quick Installation Guide is the part that actually helps during the build: slot assignments, header layouts, basic installation sequence, and safety notes. Alongside it are EU regulatory notices, which are irrelevant for the assembly process but naturally belong in the package.
The sticker sheet is clearly intended for branding and organization: series logos plus small labels that can assist with cable management. At first glance this seems decorative, but in more complex builds it can indeed be practical when several SATA devices, fan chains, or ARGB hubs need to be clearly marked. This “small” part of the bundle is an example of how manufacturers try to improve not only performance, but also build organization.
Regarding the cables, one thing stands out: SATA cables are included (visible in the package as separately wrapped leads). This is no longer a given, as many builds today rely primarily on M.2 storage and manufacturers are keen to slim down bundles. SATA, however, remains relevant for large HDDs, affordable SSDs, data archives, or backup drives. Including SATA cables saves a trip to the parts drawer and prevents a build from stalling over something as trivial as lacking the right cable.
The Motherboard Out of the Antistatic Sleeve: Layout and Initial Technical Readability
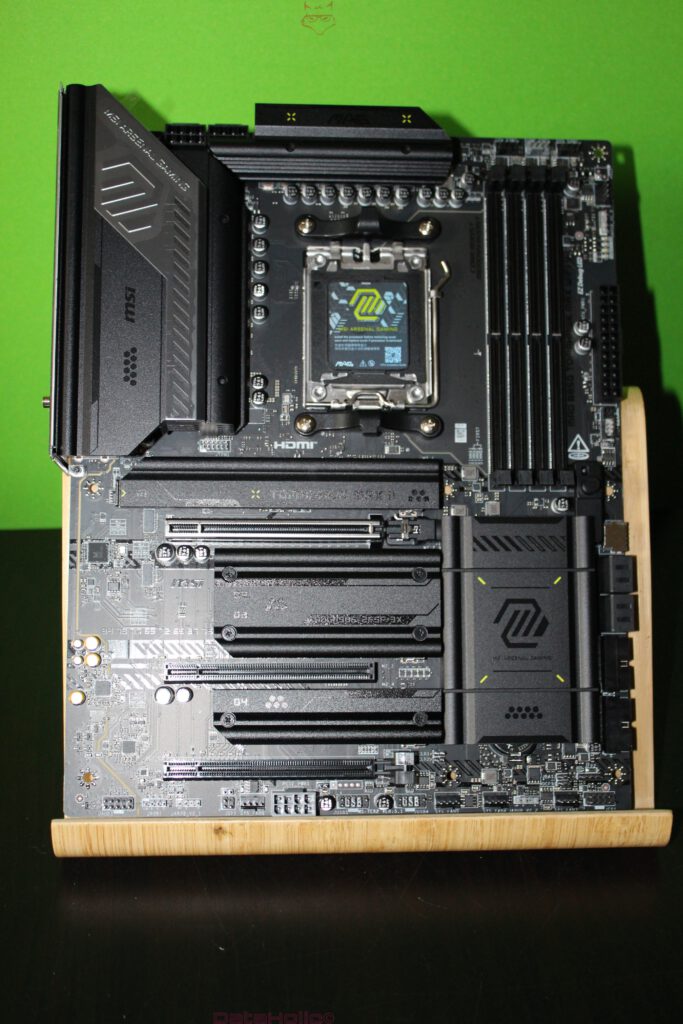
Once removed from the protective sleeve, the board appears heavily equipped without feeling overloaded. The reason lies in the extensive use of covers typical of modern platforms: VRM heatsinks, M.2 heatsinks, chipset covers, and occasionally additional slot shrouds give the board a “monolithic” appearance. Beneath these covers, however, lies a very clear and predictable ATX layout, exactly as makes sense in this class: CPU socket centered at the top, DIMM bank to the right, primary PCIe x16 slot in the upper half, and M.2 zones distributed and thermally connected.
The AM5 socket is protected by a cover. This is standard practice, but particularly relevant here because AM5’s LGA contact design places the delicate pins inside the socket. The protective cover shields against dust, accidental contact, and minor mechanical impacts that can occur surprisingly quickly when handling open packaging. At the same time, the socket area reveals a typical MSI VRM topology: the power stage zone sits above and to the left of the socket, tightly arranged to keep power paths short. MSI advertises a “14+2+1 Duet Rail Power System” on the product page. This is not yet a measurable factor during unboxing, but it explains why the VRM heatsink block is so dominant: the cooling is designed for sustained load and low temperature spikes, not merely for “it somehow works.”
To the right of the socket are four DDR5 DIMM slots. Four slots are expected in this ATX class and represent a practical compromise: sufficient capacity options without drifting into enthusiast excess. At the same time, the physical execution – latch design, distance to the CPU cooler, clearance for large heatspreaders – determines how stress-free the build will be. Here, the zone appears well dimensioned: adequate distance from the upper VRM edge and clear guidance lines ensure that RAM modules do not press against covers.
Heatsink Design: Extended Heatsink and M.2 Covers
The back of the box highlights “Extended Heatsink” and “EZ M.2 Shield Frozr II.” In the physical impression, exactly this approach becomes apparent: large, finned heatsink surfaces that do not merely sit on VRMs at isolated points but cover the area extensively. This is not only about aesthetics. VRMs benefit from surface area, airflow, and clean pressure from thermal pads. Large heatsinks also act as thermal buffers: short load spikes translate less abruptly into temperature increases. With modern Ryzen CPUs capable of aggressively exploiting load changes, this behavior matters, even if it cannot yet be measured during unboxing.
The M.2 zones are likewise covered with large heatsinks. These covers feel less like decorative elements and more like tools: broad screw points, clear edges, and a robust surface. MSI often positions DIY-friendliness in this series, and it becomes visible here. An M.2 cover that feels like thin aluminum foil is frustrating during a build. One that feels solid stays flat, applies even pressure, and can be mounted without fear of bending.
Beyond thermal considerations, mechanics play a crucial role: MSI’s “EZ” features often refer to small levers, clips, or tool-less fastening concepts. On the product page, “EZ PCIe Release” and “EZ M.2 Shield Frozr II” are explicitly mentioned. This addresses everyday annoyances: removing a graphics card without contorting fingers between backplate and cooler, or handling an M.2 cover without an endless parade of tiny screws. Such details are not glamorous, but they save time and reduce the risk of misalignment during upgrades.
PCIe Zones and “Lightning Gen5” as a Platform Statement
“Lightning Gen5” on the box serves as a signal: PCIe 5.0 is a core platform feature, both for graphics cards (x16) and NVMe storage (x4). In the board layout, this is reflected in the usual prioritization: the primary x16 slot is placed where mechanical stability is highest and where case layouts provide optimal airflow. M.2 positioning also indicates that NVMe storage is treated not as an afterthought but as the main storage architecture. MSI explicitly positions PCIe 5.0 and Gen5 M.2 as part of the high-speed orientation.
During unboxing, what matters is how this is structurally implemented: reinforced slot frames, sufficient space around screw points, and no excessive covers that later collide with large GPUs. The board appears designed with today’s heavy triple-slot cards in mind: the area around the first slot is free enough to allow clean handling even with massive coolers.
A fitting quote from Alan Kay captures hardware well: “The best way to predict the future is to invent it.” Here, the future is not being invented but prepared for. PCIe 5.0 may not be immediately necessary in every configuration, but the board is built to accommodate upcoming expansions without requiring a platform change.
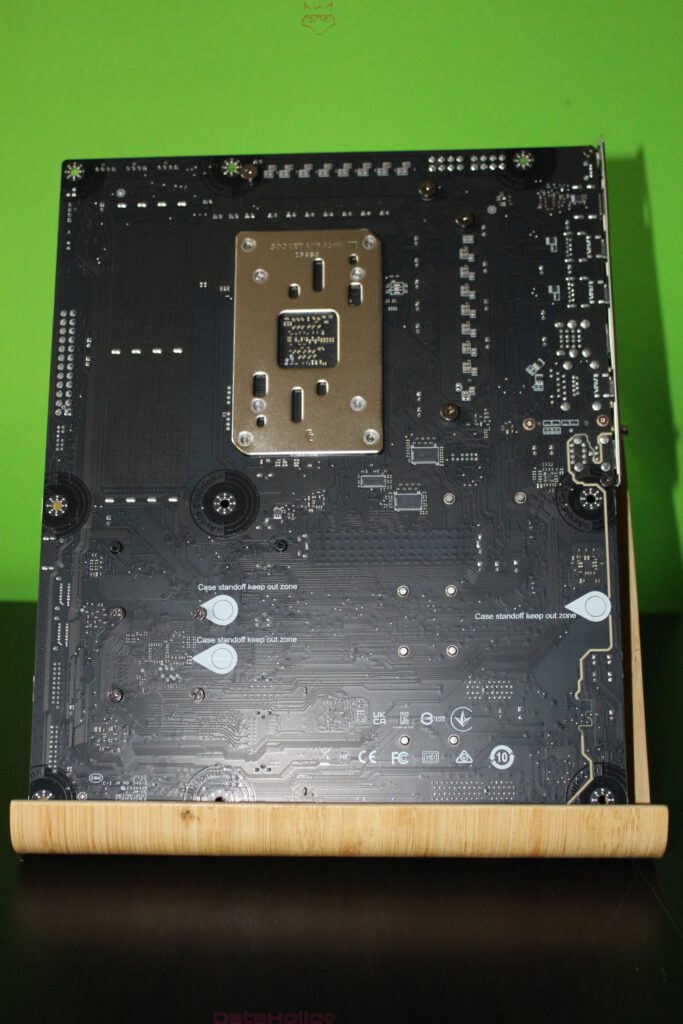
Rear View: Backplate, Reinforcement, and “Invisible” Stability
A look at the back of the PCB reveals one thing above all: AM5 demands a solid mechanical foundation. The large socket backplate is prominent and cleanly mounted. It distributes the pressure applied by the CPU cooler over a larger area. Especially with heavy coolers or AIO mounts, this is a safety advantage because it reduces localized stress on the PCB.
Beyond the socket area, the rear side shows typical reinforcement and solder patterns that indicate where particularly stressed zones are located: slot areas, VRM power feeds, and main power connectors. This is not the side that is admired during daily use, but it is the side that ensures long-term reliability. Anyone who has transported a system with minimal reinforcement and a heavy GPU more than once knows the difference.
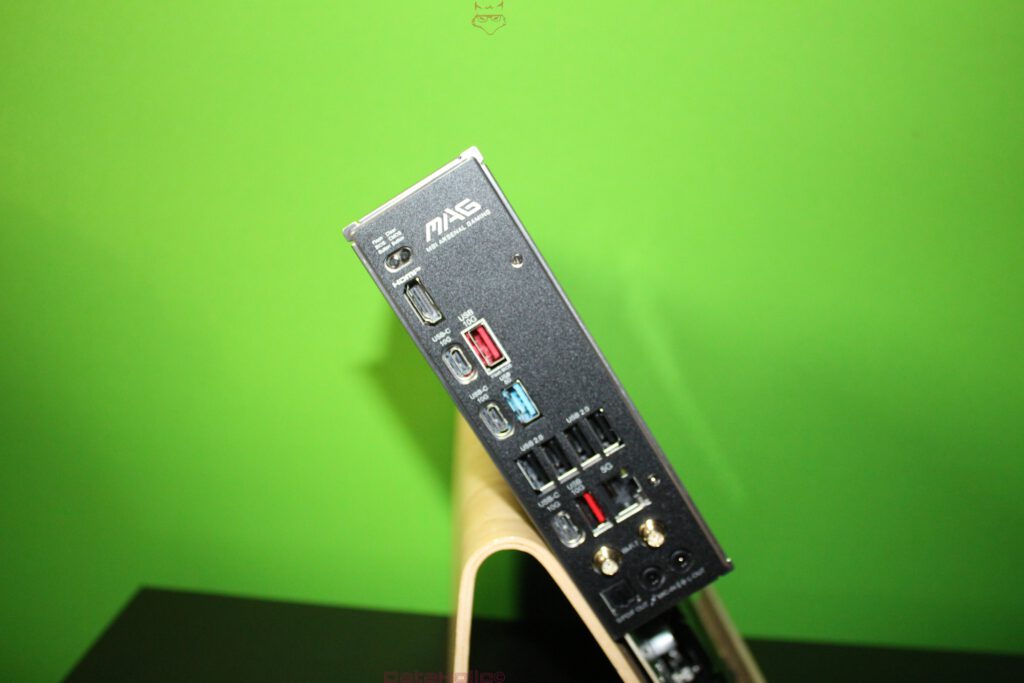
Rear I/O: Connectivity as a Practical Profile
In an unboxing context, the I/O area is one of the most important sections, because it reveals usability without ever powering on the system. Visible are multiple USB ports across different classes, an HDMI output, a 5G LAN port, and the typical Wi-Fi antenna connectors. On the back of the box, “Wi-Fi 7 / Bluetooth 5.4” and “5G LAN” are explicitly listed. This is the kind of feature combination that immediately positions the board as a modern platform hub: fast wireless networking, fast wired networking, and sufficient USB connectivity for peripherals, capture devices, external SSDs, and dongles.
The physical arrangement appears tidy: clear port groupings, easily accessible antenna connectors, and the audio section positioned at the bottom as usual. This matters because thick cables and stiff plugs can otherwise interfere with one another. Anyone regularly working with USB audio interfaces, DACs, external drives, and controller receivers benefits more from well-organized ports than from any RGB feature.
A small note from the documentation: MSI typically illustrates antenna installation in its manuals and recommends elevated placement for better reception. This aligns with the I/O design featuring two antenna connectors and reinforces the idea that Wi-Fi is not merely a fallback option here, but a fully intended connectivity path.
Accessories in Detail: SATA, Antennas, Small Parts, and Order
The bundle includes the classic small components that are often underestimated until they are missing. SATA cables are visibly included, along with small bags for screws or mounts. The overall impression is not an excessive bundle, but all essential items are present. MSI also highlights “EZ Antenna” as part of its EZ-DIY philosophy. Even though the antenna is not evaluated in a mounted state during unboxing, the point is relevant: an antenna is only truly useful if it is practical, stable, offers sufficient cable length, and has connectors that seat securely.
The documentation follows a “get ready quickly” approach. The Quick Guide is designed to allow assembly without excessive page flipping: front panel, power, RAM, GPU, M.2, fan headers, and initial startup. This is the moment when a bare board becomes a functioning system. And this is exactly where layout and labeling matter: are headers clearly printed, placed at the edge, and accessible without bumping into heatsink edges? The board appears designed with real hands and real cables in mind, not just marketing renderings.
Mechanical Convenience Features: EZ PCIe Release and DIY Logic
MSI lists “EZ PCIe Release” as a feature. At its core, this addresses a long-standing annoyance: large graphics cards, thick backplates, tight cases, and the small slot latch hidden somewhere between cooler fins and knuckles. An external or more accessible release mechanism is not a minor detail but a genuine everyday improvement, especially for test systems, frequent GPU swaps, or troubleshooting scenarios.
The same applies to M.2 handling. Modern boards offer multiple slots, often beneath covers. If each cover requires three tiny screws and the thermal pad constantly shifts, “just swapping an SSD” quickly becomes a mini project. MSI positions “EZ M.2 Shield Frozr II” as a solution to this friction. In unboxing, the key observation is that the covers feel robust enough to fulfill this role in practice.
Aesthetics as a Byproduct: MAG Design and Functional Appearance
The surface is predominantly black, with graphic accents that lean more toward “industrial” than “showcase.” This is typical Tomahawk: less polished RGB spectacle, more clean lines. The covers feature logos and patterns, but they do not feel decorative; they feel integrated into the construction. For many builds, this is actually an advantage: the board visually fits into almost any setup without clashing with GPU design or case style.
The design also serves a navigational purpose: areas are visually separated without excessive text. This aids orientation during assembly. Especially at first contact, this is helpful because the sheer number of slots, headers, and covers can otherwise feel overwhelming.
Platform Messaging Directly on the Box: Signaling the Build’s Direction
The box communicates quite openly what the board is meant for: AM5, Ryzen 9000 readiness, PCIe 5.0, Wi-Fi 7, 5G LAN, DDR5. These are not side notes but core decisions when choosing a platform. Anyone planning a system today does not just want “it runs,” but a foundation that will not feel like a compromise two years down the line. In this unboxing, MSI appears to aim precisely for that feeling – through thick heatsinks, a modern I/O setup, clear DIY mechanics, and an accessory set that does not feel artificially stripped down.
One final short remark: technology is often discussed in terms of clock speeds, generations, and buzzwords. In practice, however, the quiet details decide. Or, in a sentence often attributed to Voltaire: “Perfect is the enemy of good.” This applies doubly to motherboards. A good board is rarely the one with the most features, but the one that presents no obstacles during the build.
Notice pursuant to EU transparency regulations:
The MSI MAG B850 TOMAHAWK MAX WIFI II presented in this test report was provided to us by MSI as a non-binding loan for testing purposes. This does not constitute paid advertising.
MSI had no influence on the content, evaluation, or editorial independence of this article. All opinions expressed are based solely on our own practical experiences.
We would like to sincerely thank MSI for providing the motherboard and for the trust placed in dataholic.de.